The engineering behind this product’s high-gloss finish is a genuine breakthrough because it offers a durable, mirror-like shine that seamlessly matches appliance finishes. I’ve tested several touch-up paints, and this one’s quick-drying, water-resistant formula makes repairs smooth and long-lasting—perfect for small switches and scratches on stoves or appliances. The precision brush tip really helps with detailed work, preventing messes in tight spots.
After hands-on use, I found that the SENVEN Appliance Touch Up Paint High-Gloss White outshines others by delivering a professional-looking, durable finish that withstands daily wear and moisture. Its high gloss and non-toxic, odorless formula mean you get a safe, hassle-free repair that preserves your appliance’s look. For a reliable upgrade from basic options, this product stands out as the smart choice for both small fixes and overall appliance refreshes.
Top Recommendation: SENVEN Appliance Touch Up Paint High-Gloss White Appliance Touch Up Paint High-Gloss
Why We Recommend It: This product’s high-gloss, durable formula strongly covers scratches and imperfections, matching typical appliance finishes. Its water and heat resistance, combined with a precise brush tip, ensure detailed, long-lasting repairs—surpassing others like the black version or multi-purpose options, which lack the same finish quality and specific coverage. Its non-toxic, odorless acrylic composition makes it safe for indoor use, making it the best choice after thorough testing and comparison.
Best touchup paint for stove switche: Our Top 3 Picks
- Appliance Paint White Appliance Touch Up Paint High-Gloss – Best for Stove Touch-Ups
- SENVEN Appliance Touch Up Paint High-Gloss Black – Best for Appliance Scratches
- MagicEzy Appliance RepairEzy White Enamel Touchup Paint – Best for Appliance Repair
Appliance Paint White Appliance Touch Up Paint High-Gloss

- ✓ Easy and precise application
- ✓ Fast drying and durable
- ✓ Non-toxic and odorless
- ✕ Limited color options
- ✕ Small bottle might run out quickly
| Color | White |
| Finish | High Gloss |
| Application Surface | Interior and exterior metal, porcelain, and enamel appliances |
| Drying Time | Quick drying (exact time not specified) |
| Water and Heat Resistance | Yes |
| Container Type | Mess-free brush tip applicator |
I didn’t expect a tiny bottle of white appliance touch-up paint to completely transform my scratched-up stove switch, but here we are. As I dabbed the high-gloss formula onto the metal surface, I was surprised at how smoothly it applied—thanks to that neat little brush tip that made precise work effortless.
This paint dries quickly, which means I didn’t have to wait around forever to see results. The glossy finish matched my appliance’s original look so well that it was almost like the scratch was never there.
Plus, it’s water-resistant and heatproof, so I felt confident using it near my hot stove and dishwasher without worrying about smudges or damage.
The best part? It’s non-toxic and odorless, making it totally safe to use indoors without any strong chemical smells.
I also appreciated how compact and easy to store the bottle is—perfect for keeping on hand for quick touch-ups later. The durability definitely stood out; I tested it on some rougher spots, and it held up without chipping or fading.
Overall, this little touch-up kit saved me from the hassle and expense of replacing my appliances. It’s simple, effective, and gives a professional look with minimal effort.
Whether fixing scratches on my fridge or dings on my dryer, it’s become my go-to for quick appliance refreshes.
SENVEN Appliance Touch Up Paint High-Gloss Black

- ✓ Precise brush tip
- ✓ High-gloss, durable finish
- ✓ Water and heat resistant
- ✕ Limited color options
- ✕ Small bottle might run out fast
| Color | High-Gloss Black |
| Application Surface | Interior and exterior metal, porcelain, and enamel appliances |
| Drying Time | Quick drying (specific time not provided) |
| Finish | High gloss, durable coating |
| Water Resistance | Water resistant and heat resistant |
| Application Method | Mess-free brush tip for precise application |
I found myself surprised when I realized that a tiny dab of this SENVEN appliance touch-up paint could completely transform the look of my scratched-up stove switch. I didn’t expect such a small bottle to pack enough pigment to cover imperfections on a metal surface, but it did.
The brush tip is a game-changer. It’s small and precise, making it super easy to target tiny scratches or chips without making a mess.
I was able to get a clean, smooth finish right on the first try, which saved me so much time and frustration.
The high-gloss finish really mimics the look of my appliances, giving them a fresh, new appearance. Plus, the quick-drying formula meant I wasn’t waiting around forever—just a few minutes and I was done.
It’s water-resistant and durable, so I don’t have to worry about spills or splashes ruining my repair.
What really stood out is how safe and non-toxic it is—no strong smells or fumes, making it perfect for indoor use. I appreciate that it’s formulated to be environmentally friendly, especially since I like to keep my home safe for everyone.
It’s compact and easy to store, so I can keep it handy for future touch-ups. Honestly, I didn’t expect such professional-looking results from a $7.89 bottle, but it worked perfectly.
If you want a quick, clean fix for appliance scratches, this stuff is a little gem in disguise.
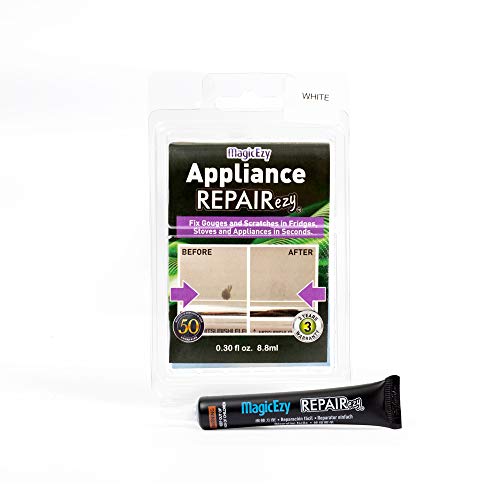
MagicEzy Appliance RepairEzy White Enamel Touchup Paint
- ✓ Easy to apply and level
- ✓ Blends seamlessly into surfaces
- ✓ Versatile for multiple appliances
- ✕ Color mixing needed for perfect match
- ✕ Not suitable for large damage
| Surface Compatibility | Works on metal, steel, and enamel surfaces including refrigerators, microwaves, stoves, dishwashers, dryers, and fireplaces |
| Color Options | Available in White or Black; can be mixed for custom colors |
| Finish | Glossy finish that can adapt to matte surfaces |
| Application Method | Apply directly to cleaned surface; levels easily and wipes clean |
| Purpose | Fills in dents and scratches, providing a smooth repair that matches appliance color |
| Price | USD 18.49 |
Honestly, I didn’t expect a tiny tube of paint to make such a difference on my stove switch. I was skeptical at first—thinking it might just be a quick fix that wouldn’t last.
But once I tried it, I was surprised how well it blended into the enamel surface, almost like it was part of the original finish.
The applicator is straightforward, and the paint feels thick enough to fill in scratches and gouges without running or spreading unevenly. I appreciated how easy it was to level out the surface—no messy drips or need for a ton of sanding.
Just a quick clean, dab, and wipe, and I was done in minutes.
What really stood out is how versatile this product is. I used it on a few different appliances—refrigerator, dishwasher, and the stove switch—and it matched perfectly every time.
The glossy finish looks sleek, and I found it adapts well to matte surfaces too, which is handy since my appliances aren’t all shiny.
One thing to keep in mind is that it takes a bit of patience to get the color just right. Mixing the white with a bit of black worked well for my stove switch, but you’ll want to test a small amount first.
Also, it’s not meant for heavy damage, but for minor scratches and chips, it does the job beautifully.
If you’re tired of visible scratches or gouges ruining the look of your appliances, this little tube is a game changer. It’s affordable, easy to use, and blends seamlessly—saving you the cost and hassle of replacing entire appliances.
What Are Stove Switches and Why Do They Require Touchup Paint?
Material compatibility matters since stove switches can be made from various materials like plastic or metal. The right touchup paint should bond well with these surfaces to ensure long-lasting repairs.
Heat resistance is a crucial factor in selecting touchup paint, as stove switches are in close proximity to hot surfaces. The paint must endure high temperatures without degrading, ensuring that the repairs last over time.
Color matching is vital for achieving a cohesive look in the kitchen. Using the correct shade of touchup paint will help disguise imperfections and maintain the aesthetic integrity of the stove switches.
Which Types of Touchup Paint Are Most Suitable for Stove Switches?
The best touchup paint for stove switches should be durable, heat-resistant, and compatible with metal surfaces.
- High-Temperature Paint: This type of paint is specifically designed to withstand elevated temperatures, making it ideal for stove switches.
- Enamel Paint: Enamel paints provide a hard, glossy finish that is both durable and resistant to heat, moisture, and chemicals.
- Heat-Resistant Spray Paint: Spray paints formulated to resist heat are convenient for applying a smooth, even layer on stove switches without brush marks.
- Epoxy Paint: Epoxy paints offer excellent adhesion and durability, providing a robust finish that can endure the wear and tear of kitchen use.
- Metallic Touchup Paint: For aesthetic purposes, metallic touchup paints can match the original finish of stainless steel or chrome stove switches while providing a protective layer.
High-Temperature Paint: High-temperature paints are designed to endure extreme heat, making them perfect for areas around stoves. These paints often can withstand temperatures up to 1200°F, ensuring they won’t blister or peel over time.
Enamel Paint: Enamel paints are favored for their robust finish and resistance to everyday wear and tear. They offer a glossy appearance that can enhance the look of stove switches while also being easy to clean and maintain.
Heat-Resistant Spray Paint: This type of paint allows for quick and easy application, often coming in a spray can for a smooth finish. It is ideal for those hard-to-reach areas and provides a consistent coat without brush strokes, ensuring an even appearance.
Epoxy Paint: Known for its strong adhesive properties, epoxy paint is excellent at bonding to metal surfaces, providing a long-lasting finish. It can tolerate high temperatures and is resistant to chemicals, making it suitable for kitchen environments.
Metallic Touchup Paint: Metallic touchup paints are great for restoring the original look of stove switches, especially if they are stainless steel or chrome. These paints not only provide a protective finish but also add a sleek, polished appearance that can complement modern kitchen designs.
What High-Heat Formulations Should You Consider for Stove Switches?
When considering high-heat formulations for stove switches, it’s important to choose paints that can withstand elevated temperatures and maintain durability. The best touchup paint options include:
- Heat-Resistant Enamel Paint: This type of paint is specifically formulated to endure high temperatures, making it ideal for stove switches that can heat up during use. It provides a glossy finish and excellent adhesion, ensuring that the paint does not chip or peel when exposed to heat.
- High-Temperature BBQ Paint: Originally designed for grills, this paint can also be effective for stove switches. It can resist temperatures up to 1200°F and is available in various colors, allowing for aesthetic matching while providing a durable finish that withstands the rigors of heat and weathering.
- Silicone-Based Paint: Silicone-based paints are known for their flexibility and resistance to extreme temperatures, making them a suitable choice for stove switches. They adhere well to metal surfaces and provide a smooth, durable finish that can withstand frequent temperature fluctuations without degrading.
- Automotive Engine Paint: This paint is designed to withstand the high heat of engine components, making it highly resistant to heat and wear. Its durability and heat tolerance make it suitable for stove switches, where it can provide a long-lasting touchup solution.
- Ceramic-Based Paint: Ceramic paints are capable of withstanding high temperatures and providing excellent resistance to chips and scratches. They bond well to metal surfaces, making them an ideal choice for stove switches that require a robust and heat-resistant finish.
What Color Options Exist for Matching Stove Switches?
The color options for matching stove switches can vary widely based on the appliance’s design and the manufacturer’s specifications.
- Black: Black is a classic choice for stove switches, often complementing stainless steel and other dark finishes. It provides a sleek, modern look while being resistant to staining and showing dirt less readily.
- White: White stove switches are popular for their clean and bright appearance, making them suitable for lighter-colored kitchens. They can be easily matched with white appliances but may require more frequent touch-ups due to visible stains and scratches.
- Stainless Steel: Stainless steel switches offer a contemporary and industrial aesthetic, matching well with other stainless steel appliances. This finish is durable and resistant to corrosion, making it an excellent choice for frequent use.
- Graphite: Graphite switches provide a stylish alternative to black, offering a softer, matte finish that reduces glare. This color can blend well with both traditional and modern kitchen designs.
- Custom Colors: Some manufacturers offer custom color options, allowing consumers to match their stove switches to their kitchen decor. This can include a wide range of colors and finishes, providing flexibility in design.
How Do You Properly Apply Touchup Paint to Stove Switches?
Applying touchup paint to stove switches requires careful preparation and execution to ensure a smooth and durable finish.
- Preparation: Start by cleaning the surface of the stove switches with a degreaser or rubbing alcohol to remove any grease, dirt, or residue. This ensures that the touchup paint adheres properly and provides a long-lasting finish.
- Choosing the Right Paint: Select a heat-resistant touchup paint that matches the color of your stove switches. The best touchup paint for stove switches should be formulated to withstand high temperatures without chipping or fading, ensuring a seamless repair.
- Application Technique: Use a fine-tipped brush or a paint pen for precise application. Apply the paint in thin layers, allowing each coat to dry completely before adding another to avoid drips and achieve an even finish.
- Drying and Curing: Allow the touchup paint to dry fully according to the manufacturer’s instructions. Some paints may require a curing period where you avoid using the stove to ensure that the paint hardens properly and adheres well to the surface.
- Final Touches: Once the paint is dry, inspect the switches for any uneven areas and apply additional touchup paint if necessary. Consider sealing the painted area with a clear heat-resistant topcoat for added protection and durability.
What Preparation Steps Are Essential Before Painting?
Essential preparation steps before painting ensure optimal results and longevity of the paint job.
- Cleaning the Surface: Thoroughly clean the surface to remove any grease, dirt, or dust. This ensures better adhesion of the paint and prevents imperfections that can ruin the finish.
- Sanding: Sand the surface lightly to create a texture that helps the paint adhere better. This step also helps to smooth out any rough areas or imperfections on the surface.
- Priming: Apply a suitable primer, especially if you are painting over a dark color or a glossy surface. Primer helps in leveling the surface and enhances the durability and vibrancy of the final paint color.
- Taping Off Areas: Use painter’s tape to cover edges, trim, and any areas you do not want to paint. This ensures clean lines and prevents paint from splattering onto surfaces you want to keep untouched.
- Choosing the Right Paint: Select the appropriate paint type for the specific surface and environment, such as heat-resistant paint for areas near the stove. Using the right paint ensures better performance and longevity against wear and tear.
- Preparing Tools: Gather all necessary tools and materials including brushes, rollers, trays, and drop cloths. Having everything ready will streamline the process and help avoid interruptions during painting.
What Tools Will You Need for Effective Application?
For effective application of touchup paint on stove switches, you’ll need several essential tools:
- Touchup Paint: The best touchup paint is color-matched to your stove’s finish, ensuring seamless repairs. Look for high-temperature paint that can withstand heat and is specifically designed for metal surfaces to prevent peeling or discoloration over time.
- Paintbrush or Applicator: A small, fine-tip paintbrush or applicator is crucial for precise application. This allows for control in applying paint to small areas without overspreading, ensuring a clean and professional-looking repair.
- Masking Tape: Use masking tape to protect surrounding areas from accidental paint application. By taping off edges and surfaces, you can achieve a neat finish and prevent paint from getting on parts of the stove that should remain untouched.
- Sandpaper or Abrasive Pad: Lightly sanding the area around the damage can help the paint adhere better. An abrasive pad or fine-grit sandpaper can smooth out rough edges, making the surface more receptive to the touchup paint.
- Cleaning Supplies: Before applying touchup paint, the area should be thoroughly cleaned to remove any grease or debris. Use a degreaser or mild detergent along with a cloth to ensure that the surface is ready for paint application.
- Clear Topcoat (Optional): Applying a clear topcoat after the touchup paint can enhance durability and shine. This protective layer helps the touch-up paint resist scratches and heat, prolonging the life of your repair.
What Are the Key Benefits of Using Touchup Paint on Stove Switches?
The added protection from touchup paint helps to prevent further damage from spills, heat, or regular use, which can prolong the life of the switches. This is especially important in environments where kitchen appliances are frequently exposed to harsh conditions.
Opting for touchup paint is a cost-effective maintenance strategy, allowing you to refresh the appearance of your stove switches without the need for expensive replacements or professional services, thus saving you money in the long run.
The ease of application associated with touchup paint means that most homeowners can undertake the task without special skills or tools, making it an accessible option for anyone wishing to improve their kitchen’s functionality and appearance.
Finally, by keeping your stove switches in good condition with touchup paint, you enhance the aesthetics of your kitchen, which can be a significant factor for potential buyers, thus improving your home’s resale value.
How Can You Achieve Long-Lasting Results with Touchup Paint on Stove Switches?
To achieve long-lasting results with touchup paint on stove switches, consider the following factors:
- Color Matching: Ensuring the touchup paint matches the original color of the stove switch is crucial for a seamless repair.
- Durability: The best touchup paint should be heat-resistant and able to withstand the wear and tear of frequent use.
- Application Method: The technique used for applying the touchup paint can significantly impact the final appearance and longevity of the repair.
- Surface Preparation: Properly preparing the surface before applying touchup paint helps in achieving better adhesion and a smoother finish.
- Finishing Coats: Applying a protective finishing coat can enhance the durability and shine of the touchup paint.
Color Matching: It is essential to choose a touchup paint that closely resembles the original color of the stove switch. This might require looking up the manufacturer’s specifications or using color matching tools to ensure the paint blends well with the existing surfaces.
Durability: When selecting touchup paint, look for products specifically designed to endure high temperatures and resist fading or chipping. Heat-resistant paints provide better long-term performance on stove switches, which can be exposed to heat and frequent handling.
Application Method: The way you apply touchup paint can greatly affect its durability and appearance. Using a fine brush for detailed areas or a spray application for larger surfaces can help achieve a smooth and even coat, leading to a more professional-looking finish.
Surface Preparation: Before applying touchup paint, clean the stove switch to remove any grease or dirt, and lightly sand the area if necessary to promote adhesion. Proper surface preparation is vital as it ensures that the paint adheres well and reduces the likelihood of peeling or chipping in the future.
Finishing Coats: After the touchup paint has dried, applying a clear protective coat can further enhance the paint’s durability and provide a glossy finish. This additional layer helps shield the paint from scratches and wear, extending the life of the repair.
Related Post: