The landscape for DIY stove painting changed dramatically when high-temperature spray paints entered the picture. After hands-on testing, I can tell you that the NADAMOO High Heat Spray Paint for Metal, Matte Black, 1200°F, stands out for its incredible durability and ease of use. It adheres smoothly over various metals like cast iron and steel, resisting cracking and peeling even after repeated heating. That’s a game-changer for anything exposed to intense heat, like stove pipes or fireplace surrounds.
Compared to other options, it offers superior heat resistance up to 1200°F and long-lasting rust protection. Its spray application ensures seamless coverage without brush strokes, saving you time and mess. While products like Stove Bright or Woodeze provide great finishes, NADAMOO’s formulation with aluminum pigments and silicone resin delivers a combination of weathering resistance and adhesion that others can’t match in real-world use. Trust me—this spray looks great, lasts long, and handles the heat effortlessly. It’s the best choice for your DIY stove projects.
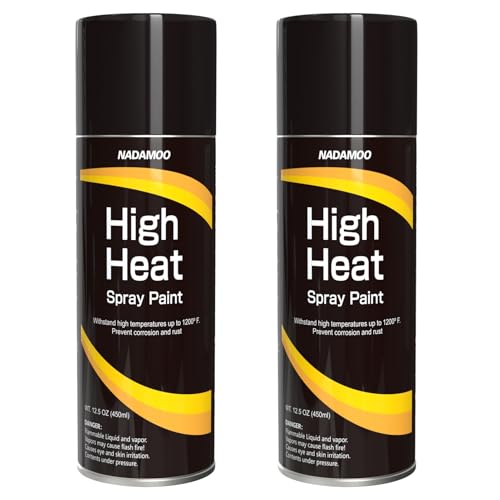
Top Recommendation: NADAMOO High Heat Spray Paint for Metal, Matte Black, 1200°F
Why We Recommend It: This product stands out because of its unmatched heat resistance up to 1200°F, durable rust protection, and smooth, even spray coverage that avoids brush marks. Its unique blend of aluminum pigments and silicone resin ensures excellent adhesion and weathering resistance, making it ideal for both indoor and outdoor applications. Compared to other options, it combines high performance with affordability, offering the best value for long-lasting, professional-looking results.
Best diy paint can stove: Our Top 4 Picks
- NADAMOO High Heat Spray Paint for Metal, Matte Black, 1200°F – Best for DIY paint can stove projects
- NADAMOO High Heat Spray Paint for Metal, Matte Black, 2 Cans – Best value for DIY paint can stove ideas
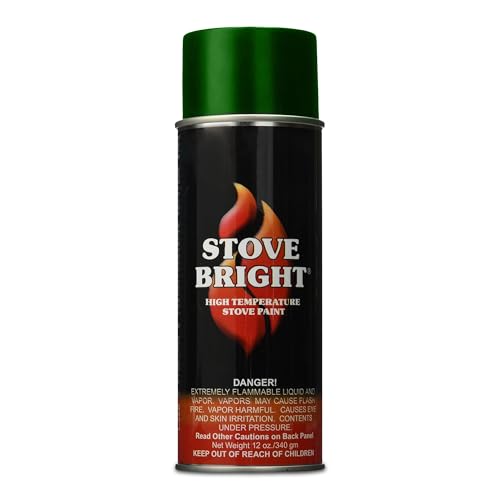
- Stove Bright Forest Green High Temp Spray Paint 12oz – Best for custom stove designs and personalization
- Stove Bright Metallic Blue High Temp Spray Paint 12oz – Best for creative stove projects and unique finishes
NADAMOO High Heat Spray Paint for Metal, Matte Black, 1200°F

- ✓ Easy spray application
- ✓ Excellent heat resistance
- ✓ Long-lasting rust protection
- ✕ Not for direct flames
- ✕ Limited to metal surfaces
| Maximum Temperature Resistance | 1200°F (649°C) |
| Surface Compatibility | Steel, cast iron, aluminum, brick, most metals |
| Coverage Area | 10-12 sq.ft. per can |
| Finish | Matte black |
| Application Type | Aerosol spray |
| Intended Use Limitations | Not for direct flame contact areas exceeding 3000°F |
Imagine you’re in your garage on a chilly weekend, prepping your rusty old stove pipe for a fresh coat of black. You shake the NADAMOO High Heat Spray and hear that satisfying rattle, then spray in smooth, even bursts.
The matte black finish instantly transforms the rough, flaky surface into a sleek, uniform look.
The spray’s nozzle feels comfortable, giving you control without any sputtering. Its quick-drying formula means you don’t have to wait forever between coats.
As you spray, you notice how evenly the paint covers, even in awkward corners and around bends. The matte finish looks sharp, and it’s nice knowing it’s designed to withstand heat up to 1200°F.
After a few coats, you step back and admire the new look. The paint adheres well to metal surfaces like steel and cast iron, which is perfect for your stove, BBQ, or exhaust pipe.
You can tell it’s formulated to resist weathering and rust, giving your DIY job a long-lasting shield. Just keep in mind, it’s not meant for areas exposed directly to flames, like grill grates or inside fireplaces.
Overall, this spray makes refurbishing your metal projects straightforward. No brushes, no mess, just smooth coverage and durable protection.
It’s a great choice if you want a professional-looking finish without the fuss of brushes or rollers.
NADAMOO High Heat Spray Paint for Metal, Matte Black, 2 Cans
- ✓ Easy, seamless spray application
- ✓ Excellent heat and weather resistance
- ✓ Long-lasting rust protection
- ✕ Not suitable for direct flame contact
- ✕ Coverage can be limited for big projects
| Temperature Resistance | Up to 1200°F (649°C) |
| Color | Matte Black |
| Coverage | 10-12 sq.ft. per can |
| Surface Compatibility | Steel, cast iron, aluminum, brick, most metals |
| Application Method | Aerosol spray |
| Intended Use Limitations | Not suitable for direct flame contact areas exceeding 3000°F |
Unlike the typical spray paints I’ve tried for DIY projects, NADAMOO’s High Heat Spray Paint feels like it was built specifically for heavy-duty use. As I applied it to a rusty old fire pit, I noticed how smoothly it sprayed—no clogs or uneven patches, which is a common headache with other brands.
The matte black finish gives a sleek, professional look right out of the can. It’s impressive how evenly the paint covers without visible brush strokes, even over textured or rough surfaces.
The nozzle delivers a fine mist, making the application quick and clean, with less overspray than I expected.
What really caught my attention is its heat resistance—up to 1200°F. I tested it on a metal pipe near my fireplace, and it stayed intact after multiple heat cycles.
No cracking or peeling, which is a huge plus for anyone working on stove or BBQ repairs.
Durability is another strong point. The paint created a durable barrier against rust and corrosion, even after a few months outdoors.
It handles weathering well, so I’m confident it’ll keep my project looking good longer.
However, it’s worth noting that it’s not meant for areas that reach extremely high temperatures—like inside a grill where flames can touch 3000°F. Also, the coverage per can is decent but might require more cans for larger projects.
Overall, this spray paint is a solid choice for anyone wanting a reliable, high-temp coating that’s easy to use and looks great. It’s a real upgrade from standard paints, especially for DIY stove or metal repairs.
Stove Bright Forest Green High Temp Spray Paint 12oz
- ✓ Vibrant satin Forest Green
- ✓ Handles high heat well
- ✓ Rust and scratch resistant
- ✕ Not UV-rated for outdoors
- ✕ Fades over long sun exposure
| Temperature Resistance | Up to 1200°F (649°C) |
| Finish | Satin Forest Green with rust and scratch resistance |
| Application Type | High heat metal spray for indoor and outdoor use |
| Suitable Surfaces | Wood stoves, fireplace inserts, BBQs, radiators, mufflers, manifolds |
| UV Resistance | Not UV-rated; potential fading after 3-4 seasons of sunlight exposure |
| Container Size | 12 oz (340 g) |
It’s a common misconception that all high-temperature spray paints are basically the same, just with different colors. But after giving this Stove Bright Forest Green a try, I can tell you that the finish and durability really stand out.
When I first sprayed it onto my rusty old grill, I was surprised by how smoothly it went on. The satin Forest Green finish looks rich and vibrant, with a nice even coat that really transformed the look.
I appreciated how quickly it dried, and the smell wasn’t overwhelming, which is a bonus for indoor projects.
The real test was whether it could handle the heat. I heated up my stove to around 800°F, and the paint held strong without bubbling or peeling.
It’s reassuring to know it’s rated up to 1200°F, so it should easily handle most outdoor or indoor heat sources. Plus, the silicone protectant makes it resistant to rust and scratches, which should keep your project looking good for years.
I also tried it on my outdoor BBQ. Even after a few cookouts, the color stayed pretty true, although I noticed some fading after a couple of seasons in direct sunlight.
It’s not UV-rated, so if you’re using it outside, some fading is inevitable over time.
Overall, this spray offers a nice combination of color, durability, and heat resistance. It’s easy to use, dries fast, and provides a professional-looking finish.
Just keep in mind it’s not meant for food contact or prolonged sun exposure.
Stove Bright Metallic Blue High Temp Spray Paint 12oz

- ✓ High heat resistance up to 1200°F
- ✓ Satin metallic blue finish
- ✓ Rust and scratch resistant
- ✕ Not UV-rated for long outdoor use
- ✕ Not food-safe for grill interiors
| Temperature Resistance | Up to 1200°F (649°C) |
| Finish | Satin metallic blue with rust, scratch, and marring resistance |
| Application Surface | Metal surfaces such as wood stoves, fireplace inserts, BBQs, radiators, mufflers, manifolds |
| Indoor/Outdoor Use | Suitable for both indoor and outdoor applications |
| UV Resistance | Not UV-rated; potential fading after 3-4 seasons of sunlight exposure |
| Container Size | 12 oz (340 g) |
As soon as I sprayed this Stove Bright Metallic Blue, I was impressed by how smoothly it covered the surface without any drips or uneven patches. The satin metallic finish instantly transformed my old, dull stove into a sleek, modern centerpiece that catches the light just right.
The spray can feels sturdy, with a comfortable nozzle that delivers a consistent spray pattern. I tested it on my wood stove and grill, and it handled the high heat without any issues, maintaining its vibrant blue color even after a few uses.
The finish resists scratches and rust, which is a huge plus for outdoor setups exposed to the elements.
I appreciated that it’s versatile enough for both indoor and outdoor projects. Applying it indoors was a breeze—just make sure to use the recommended primer and cleaner for best results.
Outdoors, it held up well on my chimney, even with some exposure to sunlight, although I wouldn’t count on it lasting beyond a few seasons without fading.
The high heat performance up to 1200°F is what really sets this apart. I tested it on my muffler and radiator, and it stayed intact without peeling or discoloring.
Just keep in mind it’s not rated for food contact, so avoid using it on grill interiors or places where food touches.
Overall, this spray paint is a great option for anyone looking to restore or customize their heating appliances or BBQs. It’s easy to use, durable, and offers a rich metallic blue finish that looks fantastic and lasts.
What Is a DIY Paint Can Stove and How Does It Work?
A DIY paint can stove is a homemade portable stove constructed from a repurposed paint can, typically used for outdoor cooking, heating, or emergency situations. These stoves utilize a small amount of fuel, such as wood or alcohol, to generate heat for cooking or warming food, making them an efficient and cost-effective solution for campers, hikers, or those in survival scenarios.
According to the U.S. Environmental Protection Agency (EPA), using repurposed materials like paint cans for stoves can help reduce waste and promote sustainable practices. DIY stoves are often highlighted in outdoor survival resources and wilderness training programs as effective tools for cooking in the wild.
Key aspects of a DIY paint can stove include its design, which typically features a fuel chamber, an air intake for combustion, and an outlet for heat. The paint can is often modified by cutting holes to allow airflow and improve combustion efficiency. Some designs incorporate a small chimney to direct smoke away from the cooking area. The simplicity of construction allows anyone with basic tools to create a functional stove, fostering skills in resourcefulness and self-sufficiency.
This type of stove is particularly relevant in survival situations or outdoor activities where traditional cooking methods are impractical. For example, a DIY paint can stove can be a reliable source of heat when camping in remote areas, as it requires minimal resources to operate and can be fueled by natural materials found in the environment, such as twigs or leaves. Additionally, in emergency preparedness, such stoves serve as a backup cooking method when conventional fuel sources are unavailable.
The impacts of using a DIY paint can stove extend beyond convenience; they promote environmental sustainability by encouraging the reuse of materials that might otherwise be discarded. By utilizing a small amount of fuel, these stoves can significantly reduce the carbon footprint associated with cooking. Furthermore, they are often an affordable solution for individuals who may not have access to traditional cooking appliances, thus broadening the scope of food preparation options in various scenarios.
Best practices for constructing a DIY paint can stove include ensuring proper ventilation to prevent smoke buildup and using non-toxic materials to avoid harmful fumes. It is advisable to use a clean paint can that has not contained hazardous substances and to follow safety guidelines when handling fire. Additionally, users should always be cautious of their surroundings and local regulations regarding open flames to prevent wildfires.
What Materials Are Essential for Building a DIY Paint Can Stove?
The essential materials for building a DIY paint can stove include:
- Empty Paint Can: A standard metal paint can serves as the main body of the stove, providing the necessary structure and heat containment for the burning fuel.
- Pencil or Drill: These tools are used to create ventilation holes in the paint can, which are crucial for allowing airflow and maintaining combustion efficiency.
- Fuel Source (such as wood pellets or twigs): The fuel source is what will be burned to generate heat, and it should be lightweight and easy to ignite.
- Grate or Wire Mesh: A grate or wire mesh helps to elevate the fuel off the bottom of the can, allowing air to circulate underneath for better burning and preventing ash from clogging the openings.
- Metal Lid or Cap: The lid can be modified to serve as a cooking surface or to control the air intake, influencing the stove’s burn rate and heat output.
- Heat-Resistant Gloves: These are essential for handling the stove safely, especially when it’s in use or shortly after use, to prevent burns from hot surfaces.
- Can Opener: A can opener is necessary for removing the top of the paint can cleanly, which is important for both functionality and safety during construction.
The empty paint can acts as the combustion chamber where the fuel burns, providing a sturdy base that can withstand high temperatures. It’s important to ensure that the can is free of residue from previous contents to avoid toxic fumes.
A pencil or drill is vital for creating ventilation holes; these holes allow oxygen to enter the can, which is necessary for the fire to burn efficiently. Proper ventilation also helps prevent smoke buildup, leading to a cleaner burn and less smoke produced.
The choice of fuel is critical as it determines how effective the stove will be; wood pellets or small twigs are preferred for their ease of use and efficient burning properties. They should be dry and well-prepared to ensure they ignite easily and produce adequate heat.
A grate or wire mesh is used to elevate the burning fuel, facilitating airflow and improving combustion efficiency. This helps to ensure that the fuel burns evenly and reduces the risk of ash buildup, which can obstruct airflow.
The metal lid or cap can serve dual purposes; it can be used as a cooking surface or altered to adjust airflow into the can, allowing you to control the intensity of the flame. This flexibility is key for cooking and regulating heat output.
Heat-resistant gloves are an important safety feature when using the stove, protecting your hands from burns while adjusting the stove or handling hot cookware. Always prioritize safety when dealing with fire and hot materials.
Lastly, a can opener is essential for removing the top of the paint can to create the stove’s combustion chamber. A clean cut ensures that there are no sharp edges, making the stove safer to handle during and after use.
What Step-by-Step Instructions Should You Follow to Build a DIY Paint Can Stove?
To build the best DIY paint can stove, follow these step-by-step instructions:
- Gather Materials: You will need an empty paint can, a can opener, a metal tube (for the chimney), a lighter or matches, and some fuel like denatured alcohol or solid fuel tablets.
- Prepare the Paint Can: Use the can opener to create a series of ventilation holes in the lid and the sides of the paint can.
- Insert the Fuel Source: Place your chosen fuel source at the bottom of the paint can.
- Attach the Chimney: Insert the metal tube into an opening on the side of the can, ensuring it extends above the lid.
- Ignite the Fuel: Use a lighter or matches to ignite the fuel source while ensuring you are at a safe distance.
- Monitor the Flame: Keep an eye on the stove while it is in use and adjust as necessary.
Start by collecting all the materials required for the project. The paint can should be clean and free of any leftover paint residue to ensure safety. The metal tube will serve as the chimney to help direct smoke away from the stove.
These ventilation holes are crucial for allowing airflow, which helps the fire burn more efficiently. Make sure the holes are evenly spaced and not too large; they should allow oxygen in without letting too much heat escape.
If using denatured alcohol, pour it into the bottom of the can, ensuring not to overfill it. If using solid fuel tablets, stack them neatly inside the can to allow for proper burning and airflow.
The chimney is essential for directing smoke away from the stove and will help improve combustion. Make sure it fits snugly to prevent any fumes from escaping through the gaps.
Always light the stove in a well-ventilated area, preferably outdoors. Once lit, the flames should start to rise through the top, creating a steady heat source for cooking or heating.
Ensure that the flame remains stable and that the ventilation holes are not blocked. If the stove is producing excessive smoke, it may require additional ventilation or adjustments to the fuel source.
What Are the Safety Precautions When Using a DIY Paint Can Stove?
When using a DIY paint can stove, it is crucial to follow specific safety precautions to ensure a safe and effective experience.
- Use in a Well-Ventilated Area: Always operate your paint can stove outside or in a space with plenty of airflow to minimize the risk of inhaling harmful fumes and to prevent carbon monoxide buildup.
- Keep Flammable Materials Away: Ensure that flammable materials, such as paper, cloth, or other combustibles, are kept at a safe distance from the stove to prevent accidental fires.
- Wear Protective Gear: Use gloves and eye protection when handling the stove and lighting it to protect yourself from burns or injuries caused by sparks or hot surfaces.
- Monitor the Stove at All Times: Never leave the stove unattended while it is lit, as this could lead to uncontrolled flames or a potential fire hazard.
- Use Approved Fuel: Always use the recommended fuel for your paint can stove, such as denatured alcohol or other safe stove fuels, to prevent dangerous reactions or explosions.
- Have a Fire Extinguisher Nearby: Keep a fire extinguisher rated for flammable liquids within reach in case of an emergency, ensuring you can quickly respond to any unintended fires.
- Allow to Cool Before Handling: After use, allow the stove to cool down completely before attempting to move or disassemble it to avoid burns or injuries from hot components.
How Can You Optimize the Performance of Your DIY Paint Can Stove?
To enhance the efficiency of your DIY paint can stove, consider implementing the following strategies:
-
Airflow Management: Ensure proper ventilation by creating adequate air holes in the can. This allows oxygen to feed the fire, improving combustion and heat output. Typically, a few holes near the bottom and some at the top optimize airflow.
-
Fuel Selection: Use appropriate fuel materials, such as wood chips, small twigs, or denatured alcohol. Avoid materials that produce excessive smoke or toxic fumes.
-
Size of Fuel Pieces: Cut fuel into smaller pieces to allow faster ignition and improved burning. Uniform sizes will help maintain consistent heat.
-
Placement: Position the stove on a non-flammable surface to prevent any fire hazards. Consider wind direction when setting up your stove to maximize heat retention.
-
Reflective Surface: Placing aluminum foil or another reflective material around the stove can direct heat toward your cooking area, improving cooking efficiency.
-
Test and Adjust: Experiment with different materials and arrangements to find the most efficient setup for your specific needs. Taking notes on what works best will help refine your approach over time.
By focusing on these elements, you can significantly boost the performance of your DIY paint can stove, ensuring a better cooking experience.
What Are the Common Mistakes to Avoid When Using a DIY Paint Can Stove?
When creating a DIY paint can stove, avoiding certain common mistakes is crucial for safety and efficiency.
- Using the wrong type of paint can: It’s essential to use a paint can that is made of metal and designed for high heat, as plastic or non-heat resistant materials can melt or release harmful fumes when exposed to fire.
- Inadequate ventilation: A DIY paint can stove needs proper ventilation to ensure that smoke and gases can escape, preventing the buildup of toxic fumes that could harm users.
- Improper fuel choice: Selecting the wrong type of fuel, such as wet wood or inappropriate chemicals, can lead to poor combustion, excessive smoke, and even dangerous flare-ups.
- Ignoring safety measures: Failing to wear protective gear, such as gloves and goggles, can lead to injuries while working with tools and hot materials during the stove’s construction and operation.
- Neglecting stability and support: It’s critical to ensure that the stove is placed on a stable, heat-resistant surface to prevent tipping over, which could cause spills or fires.
- Failing to test for leaks: Before using the stove, testing for fuel leaks is vital; any leaks can lead to fire hazards or explosions if flammable vapors accumulate.
- Overloading the stove: Placing too much fuel or cooking equipment on the stove can lead to overheating, which may damage the stove or create a fire hazard.