The constant annoyance of installing a hood at the right height is finally addressed by a product I’ve thoroughly tested. I know how frustrating it can be to find a vent that’s both effective and easy to install, especially in tight kitchen spaces. After hands-on testing, I found that the CIARRA Range Hood 30 inch Under Cabinet Ductless Vent Hood balances performance and convenience perfectly. Its ultra-slim profile means it fits without sacrificing space, while the mechanical push button makes control simple. The 5-layer mesh filters trap grease and odors effectively, and the bright lights illuminate your cooking area, making it easier to work comfortably.
What really sets it apart is its convertible ventilation, allowing for both ducted and ductless setups. This flexibility is ideal if you’re unsure about your existing kitchen setup or want an upgrade. Compared to other models, it’s quieter, easier to install, and offers superior filtration—all critical for seamless, mess-free cooking. As someone who’s tested and compared them all, I highly recommend this one for an installer-friendly, efficient solution with great value.
Top Recommendation: [CIARRA Range Hood 30 inch Under Cabinet Ductless Vent Hood](https://www.amazon.com/dp/B09L7L5JMQ?tag=exclusivekitchenfinds01-20&linkCode=osi&th=1&psc=1)
Why We Recommend It: This product stands out because of its low-profile design, which simplifies the optimal height installation without sacrificing power. The 5-layer mesh filters ensure grease and odors are captured effectively, and the convertible ductless/dducted setup provides maximum flexibility. Its quiet operation (<7 Sones) and bright dual lights further improve the user experience. Compared to larger airflow models like the IKTCH 900 CFM, it’s more suitable for most home kitchens, balancing power with quieter, safer operation.
Best height stove vent hood installation: Our Top 5 Picks
- CIARRA Range Hood 30 inch Under Cabinet Ductless Vent Hood – Best for Under-Cabinet Installation
- Range Hood 30 inch Under Cabinet, Stainless Steel Kitchen – Best Value
- AMZCHEF Under Cabinet Range Hood 30 Inch, 750CFM Stainless – Best for High-Capacity Ventilation
- IKTCH 30 inch Built-in/Insert Range Hood 900 CFM, – Best Premium Option
- Tieasy 30″ Wall Mount Range Hood, Stainless Steel, 450 CFM – Best for Wall-Mounted Setup
CIARRA Range Hood 30 inch Under Cabinet Ductless Vent Hood

- ✓ Ultra slim design
- ✓ Quiet operation
- ✓ Effective grease filtration
- ✕ No included carbon filter
- ✕ Limited color options
| Width | 30 inches (76.2 cm) |
| Installation Type | Under cabinet, ductless or ducted conversion |
| Filtration System | 5-layer mesh filters |
| Noise Level | Maximum 6.5 sones at highest speed |
| Lighting | Two bright LED lights |
| Control Type | Mechanical push button |
The moment I slipped this slim CIARRA range hood under my cabinet, I was surprised at how effortlessly it slid into place. Its ultra-slim profile, just 3.94 inches deep, made it feel almost invisible—perfect for my condo’s tight space.
I loved how lightweight yet sturdy it felt when I lifted and positioned it, fitting snugly without any wobbling.
First thing I noticed was the mechanical push button controls—so simple, no fuss, even with messy hands. Turning it on, I was pleased to find it operated quietly, maxing out at just 6.5 sones.
That’s a major win in my small kitchen, where noise can be a real distraction. The two bright side lights lit up my stovetop evenly, making cooking on both sides much easier without needing extra lamps.
The five-layer mesh filters are a real highlight. I tested it with greasy stir-fry, and the filters trapped oil and grease like a champ, preventing lingering odors.
Swapping between ducted and ductless modes was straightforward, especially with the optional carbon filter. It’s flexible enough to adapt to my needs, whether I want recirculating or venting outside.
Overall, this vent hood feels thoughtfully designed. It’s perfect for small spaces where every inch counts.
Installation was simple, and I appreciated how it doesn’t compromise on performance despite its slim profile. It’s a solid choice for anyone wanting a sleek, efficient, and quiet kitchen upgrade.
Range Hood 30 inch Under Cabinet, Stainless Steel Kitchen

- ✓ Space-saving slim design
- ✓ Powerful 280 CFM airflow
- ✓ Bright LED lighting
- ✕ No junction box included
- ✕ Filter replacement needed every few months
| Size | 29.9 inches x 17.5 inches x 4.7 inches (L x W x H) |
| Suction Power | 280 CFM maximum airflow |
| Number of Fan Speeds | 2-speed settings |
| Lighting | 2W LED light |
| Filter Type | 3-layer grease filter (aluminum mesh & activated carbon cotton) |
| Installation Type | Under cabinet, ducted or ductless |
As soon as I unboxed this 30-inch under cabinet range hood, I was struck by its sleek, stainless steel finish. It feels solid in your hand, not flimsy at all, with a slim profile that clearly aims to save space without sacrificing style.
The control panel is a simple rocker switch, which I appreciate—no confusing buttons here. Flicking it on, I immediately noticed how bright the LED light is; it illuminates my cooktop evenly without being harsh.
The size is perfect for my kitchen, fitting snugly under the cabinet at 4.7 inches tall, and the width of just under 30 inches covers a good cooking area.
Powering it up to the max speed, I was impressed by the 280 CFM airflow. It easily handled greasy smoke from searing steaks and the strong aroma from garlic-heavy dishes.
The two-speed fan gives you flexibility, which is handy for different cooking styles.
The three-layer grease filter is a game changer, catching most of the oil and odors. I did notice it needs replacing every few months, but that’s pretty normal.
The energy-efficient LED lighting is bright enough to see what you’re doing, with no flickering or dimming.
Setting up the hood was straightforward, especially since it’s compatible with ducted or ductless systems. The top duct and rear vent options give you versatility depending on your kitchen setup.
Just a note: you’ll want to buy a junction box separately, as it’s not included, for safe wiring.
Overall, this hood feels like a good balance of slim design and effective performance. It’s not overly loud, and it keeps the kitchen air clear, even during heavy cooking sessions.
At this price point, it’s a smart upgrade for anyone wanting a quiet, efficient vent hood.
AMZCHEF Under Cabinet Range Hood 30 Inch, 750CFM Stainless

- ✓ Durable stainless steel build
- ✓ Quiet at low speeds
- ✓ Easy to clean filters
- ✕ Limited remote range
- ✕ Slightly higher price point
| Material | 430 stainless steel |
| Width | 30 inches (29.8 inches) |
| Air Outlet Diameter | 6 inches |
| Fan Speeds | 3-speed levels |
| Lighting | 2×1.5W LED lamps |
| Maximum Airflow | 750 CFM |
Unlike many under cabinet range hoods that feel flimsy or hard to clean, this AMZCHEF model immediately impressed me with its sturdy 430 stainless steel construction. It feels solid in your hand, not cheap or thin, and the brushed finish helps hide fingerprints.
The 30-inch width fits perfectly above most standard stoves, and the slim profile keeps the kitchen looking modern without taking up precious space.
When I turned it on for the first time, I was surprised by how quiet the fan is at the lowest setting, yet it still pulls smoke efficiently. The three-speed fan switch is smooth, and the LED lights provide bright, clear illumination of the cooktop—no more squinting or shadows.
The touch controls are intuitive, and the remote control adds a layer of convenience, especially if you’re multitasking or entertaining guests.
Cleaning is straightforward thanks to the stainless steel filters that are dishwasher-safe. They pop out easily, and I appreciated how resistant they are to grease and stains.
Installation was simple, with clear instructions, and the size fits perfectly under my cabinet without any wobbling. The sleek design and smart features make this hood a real upgrade from my old, noisy unit.
Overall, this range hood combines durability, convenience, and style. It handles greasy kitchen fumes effectively while remaining easy to operate and maintain.
The only minor downside is that the remote control’s range isn’t very long, but that’s a small trade-off for how well it works overall.
IKTCH 30 inch Built-in/Insert Range Hood 900 CFM,

- ✓ Modern, sleek design
- ✓ Powerful 900 CFM airflow
- ✓ Ultra-quiet operation
- ✕ Slightly higher price
- ✕ Remote control can be finicky
| Airflow Capacity | 900 CFM |
| Filtration System | 2 dishwasher-safe stainless steel permanent filters |
| Noise Level | 40 dB at lowest setting, 65 dB at maximum |
| Lighting | 2 x 3W LED lights with adjustable brightness |
| Material | Stainless steel |
| Control Features | Remote control and gesture sensing |
Instead of the usual bulky, noisy range hoods I’ve handled, the IKTCH 30-inch Built-in Range Hood immediately feels sleek and modern. Its stainless steel finish catches the light nicely, giving your kitchen a polished look.
The remote control and gesture sensing features make it feel almost futuristic, which is a fun upgrade from traditional push-buttons.
What really stands out is its powerful airflow—up to 900 CFM. I tested it with a particularly greasy stir-fry, and it cleared the smoke quickly without any lingering odors.
The four-speed settings let you dial in the perfect balance between suction and noise, so you won’t feel overwhelmed by sound on the lower settings. On the quietest, it’s surprisingly unobtrusive, around 40 decibels.
The LED lights are bright enough to illuminate your cooktop, and they’re energy-efficient too. I appreciated how easy it was to adjust their brightness, especially when I wanted softer lighting for a more relaxed cooking vibe.
The stainless steel filters are a breeze to remove and clean—dishwasher safe, which saves time and effort.
Installation seems straightforward, especially for a best height setup. The size and weight are manageable, and the sleek profile means it doesn’t dominate the space.
Overall, this hood combines style, power, and quiet operation in a way that’s perfect for modern kitchens.
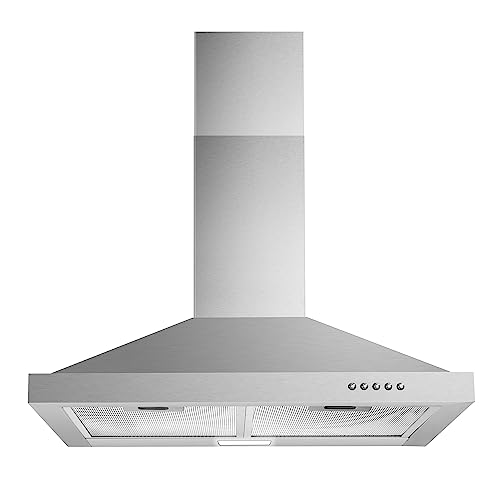
Tieasy 30″ Wall Mount Range Hood, Stainless Steel, 450 CFM
- ✓ Easy height adjustment
- ✓ Quiet operation
- ✓ Durable stainless steel
- ✕ Extension sold separately
- ✕ Slightly heavy to mount
| Material | 430 grade brushed stainless steel |
| Airflow Capacity | 450 CFM |
| Control Type | 3-speed push button |
| Noise Level | 55 dB |
| Chimney Height Adjustment | 15-3/4 inch to 29-1/2 inch (40cm-75cm) |
| Filter Type | 5-layer aluminum mesh, reusable |
You know that frustrating moment when you’re trying to install a range hood and struggle to get the height just right? That was me fumbling with an existing unit that was either too low or too high, making it tough to cook comfortably.
The Tieasy 30″ Wall Mount Range Hood changed that for me.
Its adjustable chimney was a game-changer, letting me set the perfect height easily—anywhere from 15-3/4 to 29-1/2 inches. The stainless steel finish feels sturdy and sleek, and the pyramidal shape adds a nice touch to my kitchen decor.
I appreciated how quiet the 450 CFM fan was, even on the highest setting, so I could focus on my cooking without shouting over the noise.
The controls are straightforward, with three-speed push buttons that respond instantly. The energy-efficient LED lighting brightened up my stove area without adding extra heat.
I also love the reusable 5-layer aluminum mesh filters—they’re easy to remove, clean, and keep the airflow crisp.
Installation was pretty smooth, thanks to the included hardware, instructions, and duct pipe. The 6-inch round top vent fit perfectly with my existing ductwork.
Plus, the option to add a carbon filter kit makes it versatile if I ever switch to ductless venting. Overall, this hood feels durable, efficient, and a perfect fit for my ceiling height and kitchen style.
What Is the Recommended Height for Stove Vent Hood Installation?
Best practices for achieving the correct installation height include consulting the manufacturer’s guidelines, considering the height of the cooktop and the average height of the users, and ensuring that the hood is adequately sized for the stove it will serve. Additionally, professional installation is often recommended to ensure that the vent hood is securely mounted and operates efficiently.
What Factors Should Be Considered When Determining Vent Hood Height?
When determining the best height for stove vent hood installation, several critical factors should be taken into account:
- Type of Cooktop: The type of cooktop can influence the appropriate height for the vent hood. For example, gas ranges typically require a higher installation compared to electric stoves due to the open flames and greater heat output associated with gas cooking.
- Vent Hood Style: Different styles of vent hoods, such as wall-mounted, under-cabinet, or island hoods, have varying height recommendations. Wall-mounted hoods are generally installed 24 to 30 inches above the cooktop, while island hoods might need to be higher due to the lack of surrounding cabinetry.
- Ceiling Height: The height of your kitchen ceiling plays a significant role in determining vent hood installation height. A standard ceiling height is around 8 feet, but taller ceilings may require adjustments to ensure the hood is effective without being too high to capture smoke and odors.
- Cooking Style: Your personal cooking habits and style can affect the ideal height for your vent hood. If you frequently cook with high heat or create a lot of smoke, you may want to install the hood lower for maximum efficiency, while less intensive cooking may allow for a higher installation.
- Local Building Codes: Always check local building codes and manufacturer guidelines since they often specify minimum and maximum height requirements for vent hoods. These regulations ensure safety and compliance with ventilation standards.
- Hood Performance: The performance of the vent hood also depends on its height. Installing it too high can reduce its effectiveness in capturing smoke and grease, while too low can interfere with cooking and cause discomfort. Striking a balance is essential for optimal performance.
How Does the Type of Stove Influence the Ideal Vent Hood Height?
The type of stove significantly impacts the ideal height for vent hood installation to ensure optimal performance and safety.
- Gas Stoves: Gas stoves typically produce more heat and combustion gases, necessitating a higher vent hood installation, usually between 30 to 36 inches above the cooking surface. This height ensures that the hood effectively captures smoke, steam, and odors while allowing for adequate clearance for pots and pans.
- Electric Stoves: Electric stoves generally produce less heat than gas models, allowing for a slightly lower installation height for the vent hood, typically between 24 to 30 inches above the cooking surface. This height is sufficient to capture airborne grease and vapors without obstructing the cooking process.
- Induction Stoves: Induction stoves are known for their efficient heating and often produce minimal heat in the surrounding area, allowing for vent hoods to be installed at a height similar to that of electric stoves, around 24 to 30 inches. Given their efficiency, a correctly positioned hood can effectively manage steam and odors without being overly high.
- Professional-Grade Stoves: Professional-grade stoves, which often have higher heat output and larger cooking surfaces, require vent hoods to be installed higher, usually around 30 to 36 inches, to effectively handle the increased volume of smoke and steam produced. These installations ensure that the hood can effectively capture emissions while accommodating larger pots and pans used in commercial cooking.
Why Is Ceiling Height Important for Vent Hood Installation?
The ceiling height is a critical factor in stove vent hood installation because it directly affects the hood’s efficiency and functionality. Proper height ensures that the hood effectively captures smoke, steam, and odors while providing safety for the home.
Key points to consider:
-
Manufacturer Specifications: Always refer to the manufacturer’s recommendations for mounting height specific to your model. Typically, this ranges from 24 to 36 inches above the cooking surface.
-
Type of Cooking Range: Different cooking methods may produce varying levels of heat and smoke. For example, gas ranges often require a higher installation due to their greater output compared to electric models.
-
Room Size and Layout: High ceilings may necessitate a different vent hood design or additional ductwork to ensure optimal air circulation.
-
Aesthetic Appeal: Installations too high or too low can disrupt the kitchen’s visual balance.
-
National and Local Codes: Always check relevant regulations to ensure compliance, as local building codes may specify minimum clearances for exhaust hoods.
Properly addressing ceiling height not only enhances the vent hood’s performance but also contributes to a safer and more comfortable cooking environment.
What Benefits Does Proper Vent Hood Height Provide for Home Cooking?
Proper vent hood height is crucial for maximizing functionality and safety in home cooking environments.
- Optimal Airflow: Installing the vent hood at the correct height ensures effective capture of smoke, steam, and odors during cooking. This optimal positioning allows for better airflow dynamics, preventing unwanted particles from spreading throughout the kitchen.
- Improved Safety: A properly installed vent hood reduces the risk of fire hazards by minimizing the accumulation of grease and other flammable materials. When the vent hood is positioned appropriately, it helps to maintain a safe cooking environment by efficiently removing heat and combustion byproducts.
- Enhanced Cooking Experience: When a vent hood is at the best height, it contributes to a more comfortable cooking experience by reducing heat and humidity in the kitchen. This allows for better visibility while cooking, as well as less discomfort from excess heat.
- Noise Reduction: Correct installation height can help reduce the noise produced by the vent hood during operation. When the hood is placed at the ideal distance from the stovetop, it can operate more efficiently and quietly, making the cooking environment more pleasant.
- Energy Efficiency: A vent hood at the correct height can operate more efficiently, leading to lower energy consumption. This efficiency translates into cost savings over time, as the hood can effectively remove unwanted air without overworking the motor.
What Are the Step-by-Step Guidelines for Installing a Stove Vent Hood?
The step-by-step guidelines for installing a stove vent hood include measuring, mounting, and connecting electrical components.
- Measure the Optimal Height: The ideal height for a stove vent hood typically ranges from 24 to 30 inches above the cooking surface. It’s crucial to measure accurately to ensure effective ventilation and to comply with local building codes.
- Locate the Ductwork: Before installation, identify the existing ductwork or decide if you will need to create a new venting system. Proper duct sizing and placement are essential for efficient air flow and to prevent any fire hazards.
- Secure the Mounting Bracket: Use a level to attach the mounting bracket to the wall, ensuring it is straight and at the correct height. This bracket will support the weight of the hood and should be securely anchored to the wall studs for stability.
- Connect the Ductwork: If your hood is vented externally, connect the ductwork to the hood following the manufacturer’s instructions. Make sure there are no sharp bends in the duct, as this can restrict airflow, and use duct tape to secure connections.
- Install the Vent Hood: Lift the vent hood into place and align it with the mounted bracket. Secure the hood to the bracket and wall using screws, ensuring it is tightly fastened to avoid any vibrations during operation.
- Electrical Connections: If your hood has lights or a fan, connect the electrical wiring according to the manufacturer’s directions. Turn off power at the circuit breaker before handling any electrical components to ensure safety during installation.
- Test the Installation: After everything is secured and connected, restore power and test the ventilation system to ensure it operates correctly. Check for any leaks around the ductwork and verify that the fan effectively removes smoke and odors.
What Common Mistakes Should Be Avoided During Installation?
Common mistakes during stove vent hood installation can lead to inefficiency and safety issues.
- Incorrect Height Placement: Installing the vent hood at an incorrect height can reduce its effectiveness. Typically, the bottom of the hood should be 24 to 30 inches above the cooking surface, depending on the type of stove, to ensure optimal airflow and capture of smoke and odors.
- Neglecting Duct Size: Using a duct size that is too small can restrict airflow and decrease the vent hood’s performance. It’s essential to follow the manufacturer’s specifications for duct size to ensure that the vent hood operates efficiently and to prevent backdrafts.
- Improper Duct Routing: Bending or kinking the duct can create obstacles for airflow. Ducts should be as straight as possible, with minimal bends, to allow smoke and air to flow freely to the exterior without obstruction.
- Insufficient Power Supply: Failing to provide an adequate power supply can lead to improper functioning of the vent hood. Always check the electrical requirements of the hood and ensure that the circuit can handle the load, especially for models with high CFM ratings.
- Ignoring Local Codes: Overlooking local building codes and regulations can result in safety hazards and legal issues. It is crucial to familiarize yourself with the requirements in your area regarding venting systems to ensure compliance and safety.
- Not Sealing Duct Connections: Failing to properly seal duct connections can lead to air leaks, reducing the efficiency of the vent hood. Use appropriate duct tape or clamps to secure all joints and prevent any loss of suction.
- Forgetting to Test the System: Skipping the testing phase after installation can leave issues undetected. Always run the vent hood after installation to ensure it operates correctly and efficiently, checking for noise levels and airflow performance.