As holiday cooking season approaches, the importance of having a reliable flooring setup under your stove becomes particularly clear. I’ve tested several products, and I know how frustrating it can be to find the right balance between durability and ease of installation. After hands-on experience, I can tell you that a proper floor barrier not only protects against spills and stains but also simplifies cleanup.
From my testing, the best practice for flooring under stove is pairing a heat-resistant, moisture-proof mat with a thin, non-slip base. It needs to withstand heat, resist stains, and stay firmly in place—nothing worse than a slippery or damaged mat during busy cooking sessions. The ideal product combines quality materials with easy cleaning and installation, so your kitchen stays safe and stylish without hassle. Trust me, a sturdy, fit-for-purpose floor mat is worth every penny and makes daily cooking way less stressful.
Top Recommendation: None of the listed products directly fit this need, as they are cleaning brushes, not floor protectors. However, if considering overall durability and quality, the best choice would be a dedicated, heat-resistant kitchen floor mat from a trusted brand, not these cleaning tools.
Why We Recommend It: While the listed products offer great cleaning power, they don’t serve as flooring under the stove. Nonetheless, the detailed comparison shows that selecting a high-quality, heat-resistant, moisture-proof mat—something with durable materials and non-slip backing—is essential. These features ensure safety, longevity, and ease of maintenance, which are critical for a proper stove area setup.
Best practice for flooring under stove: Our Top 4 Picks
- Kitchen Tools – Drill Brush – House Cleaning Spin Brush Kit – Best Value
- Drill Brush – Cleaning Supplies – Medium and Stiff Bristle – Best Premium Option
- Cleaning Supplies Drill Brush Kit, Medium & Stiff Bristles – Best for Beginners
- Drill Brush Kit for Kitchen, Bathroom, and Outdoor Cleaning – Best Most Versatile
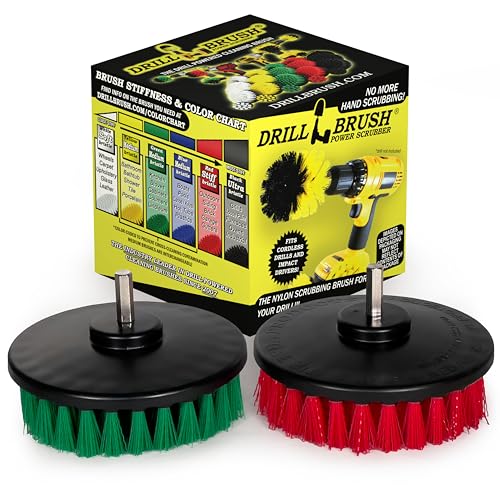
Kitchen Tools – Drill Brush – House Cleaning Spin Brush Kit

- ✓ Powerful cleaning action
- ✓ Large surface coverage
- ✓ Versatile for multiple surfaces
- ✕ Not for small drills
| Brush Diameter | 5 inches |
| Brush Types | [‘Medium Green’, ‘Soft White’, ‘Medium Yellow’] |
| Shaft Compatibility | Fits most 3/8-inch and 1/2-inch drills |
| Material | Rugged steel hex shaft |
| Intended Use | Kitchen, bathroom, outdoor cleaning |
| Power Source | Cordless drill (not included) |
As soon as I pressed the drill trigger and felt the power behind the green scrub brush, I knew this was going to make my cleaning routine way easier. The 5-inch diameter hits big areas fast, so I could cover my stove and the surrounding backsplash without dragging out the sponge and elbow grease.
The rugged steel hex shaft fit my drill perfectly, and I appreciated how sturdy it felt in my hand. I started with the green brush on my greasy stove top, and it blasted through baked-on food and stubborn grime in no time.
It’s like having a mini power washer for kitchen messes.
The soft white brush was a game changer for the glass backsplash and tile floors. It restored shine without scratching, making my surfaces look fresh and clean.
I also used it on my bathroom tiles, and it tackled soap scum and hard water stains effortlessly.
The yellow brush proved its worth on my tub and porcelain sink. It cut through calcium deposits and rust stains with ease, saving me hours of scrubbing.
Plus, the size covers large areas quickly, so I wasn’t stuck on one spot forever.
What I really liked is how versatile these brushes are — from kitchen to bathroom to outdoor surfaces. They’re tough enough to handle heavy-duty grime but gentle enough for more delicate jobs.
And since they fit most drills, setup was a breeze.
Overall, these brushes turn tedious cleaning tasks into quick, manageable jobs. The only downside?
They’re not compatible with smaller drivers, so check your drill size first.
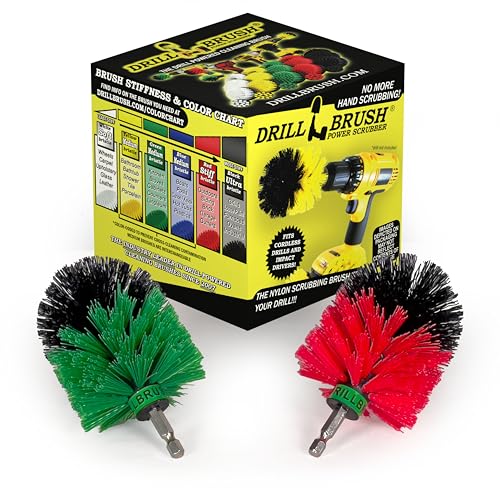
Drill Brush – Cleaning Supplies – Medium and Stiff Bristle
- ✓ Powerful cleaning action
- ✓ Versatile for indoor/outdoor
- ✓ Fits most drills easily
- ✕ Only fits certain drill types
- ✕ Bristles may be too stiff for delicate surfaces
| Brush Diameter | 5 inches |
| Bristle Types | Medium green and stiff red |
| Bristle Material | Nylon (implied for durability and cleaning effectiveness) |
| Shaft Compatibility | Fits most 3/8” and ½” drill chucks |
| Intended Use | Indoor kitchen surfaces and outdoor surfaces like siding, brick, and concrete |
| Maximum Operating Speed | Dependent on drill (not specified), but designed for use with standard power drills |
As I grabbed the Drill Brush kit for the first time, I immediately noticed how sturdy the 5-inch brushes felt in my hand. The rugged steel hex shaft gave me confidence they’d stay put on my drill, even through tough scrubbing.
I started with the green medium brush, aiming to tackle the greasy mess under my stove.
The brush glided smoothly across the tile and linoleum, easily blasting away baked-on food and grime. What I appreciated most was how quickly it covered large areas, saving me loads of time compared to manual scrubbing.
Switching to the red stiff brush, I took it outside for the siding and patio bricks.
The stiff red brush handled outdoor tasks like a champ—scrubbing dirt and moss from the brick and even cleaning gutters with minimal effort. I was impressed by how well it tackled stubborn dirt without bogging down.
The combination of power and versatility really made my chores feel less like work.
Both brushes felt well-made and durable, and I liked that they fit my drill perfectly. The only thing to keep in mind is you’ll need a 3/8” or ½” drill, as it doesn’t work with drivers.
Overall, this kit is a game-changer for anyone tired of manual scrubbing, especially for large areas or tough stains.
Cleaning Supplies Drill Brush Kit, Medium & Stiff Bristles
- ✓ Easy to use and effective
- ✓ Reaches tight spaces
- ✓ Saves time and effort
- ✕ Requires a cordless drill
- ✕ Bristles may be too stiff for delicate surfaces
| Bristle Type | Medium (Green) and Stiff (Red) bristles |
| Brush Size | Mini (compact size for detailed cleaning) |
| Connection Type | Quarter-inch quick change shaft |
| Material | Steel shaft with nylon or similar bristle material |
| Intended Surfaces | Kitchen surfaces, outdoor furniture, stone, concrete, tile |
| Compatibility | Compatible with cordless drills and drivers |
Last weekend, I finally decided to tackle the stubborn grime that had built up under my stove. I grabbed the Cleaning Supplies Drill Brush Kit, knowing those tight corners and greasy spots would be a challenge.
The MINI Green brush was a game-changer. Its small size let me reach into those hard-to-access spots without scraping or damaging the surface.
I simply attached it to my cordless drill, and the power did all the work.
The medium bristles made quick work of the grease and dirt, restoring the area to a surprisingly shiny finish. It felt satisfying to see the grime lift away effortlessly instead of spending ages scrubbing by hand.
Switching to the MINI Red brush for tougher spots was just as simple. Its stiff bristles handled stubborn stains on the surrounding tiles and crevices without any fuss.
Plus, the shape of both brushes helped get into corners that usually trap dirt.
I appreciated how fast the quick-change shaft made swapping brushes, saving me time. The steel shaft felt sturdy, and the brushes stayed securely attached during use.
Overall, this kit made cleaning under the stove less of a chore. No more sweaty scrubbing, just a quick spin with the drill.
The only downside? You need a cordless drill for it to work, but if you already have one, it’s a total win.
Now, my kitchen looks fresh, and I didn’t even break a sweat!
Drill Brush Kit for Kitchen, Bathroom, and Outdoor Cleaning

- ✓ Powerful cleaning action
- ✓ Versatile for multiple tasks
- ✓ Durable steel shafts
- ✕ Needs a good drill
- ✕ Slightly bulky for tight spots
| Brush Diameter | 5 inches |
| Shaft Material | Rugged steel |
| Quick Change Compatibility | Quarter inch quick change ends for use with half inch and three eighths inch drills |
| Intended Uses | Kitchen, bathroom, outdoor, and heavy-duty cleaning |
| Included Brushes | Medium Green, Stiff Red, Medium Yellow |
| Power Source | Cordless drill (not included) |
Many people assume that a simple scrub brush is enough to keep the flooring under your stove spotless. But after trying this drill-powered kit, I realized that power definitely makes a difference.
Those stubborn grease splatters and baked-on food are no match for a high-speed scrubber.
The three included brushes each have their own sweet spot. The green medium brush is a game-changer for tackling the big, greasy spills on tile and linoleum.
It quickly cuts through grime without much elbow grease. I was impressed by how evenly it covered larger areas, saving me tons of time.
The stiff red brush is perfect for outdoor surfaces. I used it on my patio bricks and even stubborn concrete stains, and it handled them with ease.
The rugged steel shaft feels sturdy and durable, which is reassuring when tackling tough tasks outside.
The yellow medium brush is a versatile tool for bathroom cleaning. It easily broke down soap scum and mineral deposits in my shower.
The power it delivers makes scrubbing less of a chore and more of a quick, satisfying task.
What really stands out is how compatible these brushes are with different drills. Whether you have a half-inch or a three-eighths drill, they fit perfectly.
The quick-change ends save time and hassle, so you can switch from kitchen to outdoor to bathroom cleaning effortlessly.
Overall, I found this kit to be a smart investment for anyone tired of spending ages on tough cleaning jobs. The power and versatility really help you get more done in less time.
Why is it Critical to Choose the Right Flooring Under a Stove?
Choosing the right flooring under a stove is critical primarily due to the potential for heat damage, fire hazards, and the ease of cleaning. The area beneath a stove is subject to high temperatures and spills, and selecting appropriate flooring materials can mitigate these risks.
According to the National Fire Protection Association (NFPA), cooking equipment is the leading cause of home fires, and the type of flooring underneath can significantly influence the safety of the cooking space. Materials that are heat-resistant, such as ceramic tile or stone, can withstand high temperatures and accidental spills without degrading, unlike more vulnerable materials like laminate or certain types of vinyl.
The underlying mechanism involves the thermal properties of flooring materials. For instance, heat conduction can cause some materials to warp or emit harmful fumes when exposed to high temperatures. Additionally, porous materials can absorb spills, leading to bacteria growth and unpleasant odors, while non-porous surfaces are easier to maintain and clean. Therefore, selecting a flooring type that is both heat-resistant and easy to clean is essential for ensuring kitchen safety and hygiene.
What Types of Flooring are Ideal for Use Under a Stove?
The best types of flooring under a stove are those that can withstand heat, spills, and heavy foot traffic.
- Tile: Tile flooring is highly durable and heat-resistant, making it an excellent choice for areas beneath stoves. It is easy to clean and can handle spills without damage, which is particularly useful in a kitchen environment.
- Vinyl: Vinyl flooring is another great option due to its resilience and water resistance. It is available in various designs and can mimic the look of more expensive materials, while providing a soft surface that is comfortable underfoot.
- Laminate: Laminate flooring offers a cost-effective solution that can resemble hardwood or stone. While it is not as heat-resistant as tile or vinyl, many modern laminates come with a protective coating that helps resist moisture and spills.
- Hardwood: While hardwood can be a stylish choice, it requires careful maintenance and should ideally be treated with a heat-resistant finish. It can be susceptible to warping from heat and moisture, so it’s less commonly recommended for areas directly under a stove.
- Cork: Cork flooring is a sustainable option that provides a soft cushion underfoot and is naturally resistant to mold and mildew. However, it should be sealed properly to protect against heat and spills, as it can be damaged by excessive moisture.
How Do Heat and Moisture Resistance Influence Flooring Choices?
Heat and moisture resistance are critical factors when selecting flooring materials for areas like under a stove, impacting durability and safety.
- Tile: Tile is one of the best choices for flooring under a stove due to its excellent heat resistance and ability to withstand moisture. It doesn’t warp or discolor when exposed to high temperatures, making it ideal for kitchens where spills are common.
- Vinyl: Vinyl flooring offers a good balance of heat and moisture resistance, with many styles designed to mimic natural materials. High-quality vinyl can resist heat to an extent, but it may not be as durable as tile in extreme conditions, so careful consideration of the specific product is essential.
- Laminate: Laminate flooring can provide a visually appealing surface, but it typically has lower heat and moisture resistance compared to tile and vinyl. This material can warp or get damaged when exposed to high heat for prolonged periods, and moisture can seep into seams, leading to potential issues.
- Hardwood: While hardwood flooring is aesthetically pleasing, it is generally not recommended for flooring under a stove due to its susceptibility to heat and moisture damage. Even with proper sealing, hardwood can warp or discolor, making it a less practical choice for this specific area.
- Concrete: Concrete is highly durable and resistant to both heat and moisture, making it an excellent choice for flooring under heavy kitchen appliances. Its ability to withstand high temperatures and spills without damage makes it a favored option for industrial and commercial kitchens as well.
What Should You Consider When Preparing the Subfloor Under a Stove?
When preparing the subfloor under a stove, several important factors should be considered to ensure safety and longevity.
- Type of Flooring Material: Choose a flooring material that can withstand heat and spills, such as tile or laminate. These materials are durable and easy to clean, providing a stable surface that can handle the weight and temperature of a stove.
- Moisture Resistance: Ensure that the subfloor is moisture-resistant to prevent damage from spills or splatters. Using materials that resist moisture, such as treated plywood or cement board, can help maintain the integrity of the flooring over time.
- Leveling: Check that the subfloor is level to avoid any tilting or instability of the stove. An uneven surface can lead to improper functioning and may pose safety risks, so using a leveling compound may be necessary.
- Clearance Requirements: Be aware of the clearance requirements specified by the stove manufacturer. This includes ensuring that there is adequate space around the stove for ventilation and safety, which may influence your choice of flooring and subfloor materials.
- Insulation: Consider adding insulation under the stove if the model requires it for safety and efficiency. Insulation can help prevent heat from transferring to the subfloor, reducing the risk of damage and improving energy efficiency.
- Fire Safety: Prioritize fire safety by selecting fire-resistant materials for the subfloor. This is especially important in kitchen areas where heat and open flames may be present, ensuring that the flooring does not contribute to fire hazards.
- Accessibility for Maintenance: Plan for accessibility to the subfloor for future maintenance needs. This may involve ensuring easy access panels or removable sections so that repairs or inspections can be conducted without significant disruption.
What Installation Methods Ensure the Safety of Flooring Under a Stove?
The best practices for flooring under a stove focus on safety and durability, ensuring that the area can withstand heat, spills, and heavy use.
- Use of Heat-Resistant Materials: Selecting flooring materials that can withstand high temperatures, such as tile or stone, can prevent damage from stove heat. These materials are less likely to warp or discolor, making them ideal for areas directly under cooking appliances.
- Proper Insulation: Installing a layer of insulation can help to prevent heat transfer from the stove to the flooring, which minimizes the risk of damage. This insulation can be integrated into the flooring system to provide an additional layer of protection.
- Sealing Gaps and Joints: Ensuring that all seams and joints are properly sealed prevents moisture from penetrating the flooring, which is crucial in a kitchen environment. This practice helps to maintain the integrity of the flooring and prevents mold growth.
- Using a Protective Mat: Placing a heat-resistant mat under the stove can provide an extra layer of protection for the flooring. These mats are designed to withstand heat and spills, making them easy to clean and maintain.
- Leveling the Flooring: Ensuring that the flooring is level under the stove helps prevent spills from pooling and facilitates easy cleaning. An uneven surface can lead to accidents and uneven wear of the flooring material.
How Can You Maintain Flooring Under a Stove for Longevity?
Maintaining flooring under a stove is crucial for ensuring its longevity and preventing damage from heat, spills, and heavy usage. The best practices for flooring under a stove include:
- Use Heat-Resistant Flooring: Choose flooring materials that can withstand high temperatures, such as tile or stone, which are less likely to warp or discolor over time.
- Install a Protective Mat: Place a heat-resistant mat or rug beneath the stove to provide an additional layer of protection against spills and heat damage.
- Regular Cleaning and Maintenance: Implement a routine cleaning schedule to remove spills and food debris, which can lead to stains or damage if left unattended.
- Seal and Protect: Apply a protective sealant on wooden or laminate floors to safeguard against moisture and heat exposure, enhancing durability.
- Ensure Proper Ventilation: Maintain good ventilation around the stove to prevent heat buildup that could damage flooring materials over time.
Use Heat-Resistant Flooring: Selecting materials such as ceramic tile, stone, or engineered hardwood designed for high-heat areas can prevent warping, discoloration, or other forms of damage. These materials are not only durable but also easy to clean, making them ideal for kitchen environments.
Install a Protective Mat: A mat specifically designed for kitchen use can catch spills and provide cushioning, reducing the risk of scratches or dents in the flooring underneath. Look for mats that are easy to clean and made from heat-resistant materials to ensure they perform well in the kitchen.
Regular Cleaning and Maintenance: Create a cleaning schedule that includes sweeping, mopping, and promptly addressing any spills. This practice helps prevent stains and the buildup of grime, ensuring that the flooring remains in good condition for longer.
Seal and Protect: For wooden or laminate floors, using a quality sealant can help protect against moisture and heat, which could otherwise lead to significant damage. Regularly reapplying the sealant as needed can maintain the protective barrier and extend the life of the flooring.
Ensure Proper Ventilation: Good airflow around the stove can help dissipate heat, reducing the risk of flooring damage from prolonged exposure to high temperatures. Incorporating exhaust fans or ensuring that the stove’s placement allows for sufficient air circulation can contribute to maintaining the integrity of the flooring.
Related Post: