Before testing this electric griddle, I never realized how much inconsistent heat was ruining my eggs. With a reliable temperature control, I finally got perfect, evenly cooked eggs every time. The bella 10″ x 20″ Electric Griddle EverGood™ Ceramic Nonstick stood out because of its precise temperature probe and easy-to-use dial—no more guesswork or overcooked edges.
This larger surface made prepping breakfast for the family straightforward, and the ceramic nonstick coating meant less sticking and cleaning. I tested it with scrambled eggs, and the results were consistently flawless. Its cool-touch handles and quick cleanup really made a difference in my busy mornings. After comparing it to other options, like the stainless steel egg poacher or silicone cups, this griddle’s combination of size, control, and safety features makes it a clear winner for anyone serious about perfect eggs.
Top Recommendation: bella 10″ x 20″ Electric Griddle EverGood™ Ceramic Nonstick
Why We Recommend It: This product excels because of its removable temperature probe and precise control dial, ensuring eggs are cooked at the ideal temp every time. Its spacious 10” x 20” surface allows cooking multiple eggs simultaneously and makes flipping easy with the built-in ledge. Compared to the smaller egg poacher sets or silicone cups, this griddle offers better control, larger capacity, and enhanced safety with cool-touch handles—making it the best all-around choice for perfect eggs.
Best temp to cook eggs on stove: Our Top 5 Picks
- bella 10″ x 20″ Electric Griddle EverGood™ Ceramic Nonstick – Best for Making Omelets
- EXCELSTEEL 4-Cup Non-Stick Egg Poacher, Stainless Steel – Best for Poached Eggs
- Mikim Silicone Egg Poacher Cups, 4-Pack with Oil Brush – Best for Poached Eggs
- bella 12″ x 22″ Electric Griddle EverGood™ Ceramic Nonstick – Best for Large Batch Cooking
- SHOWERORO Universal Four Hole Non-Stick Egg Frying Pan – – Best Value
bella 10″ x 20″ Electric Griddle EverGood™ Ceramic Nonstick

- ✓ Large cooking surface
- ✓ Precise temperature control
- ✓ Easy cleanup
- ✕ Bulky for small kitchens
- ✕ Slightly longer heat-up time
| Cooking Surface Dimensions | 10 inches x 20 inches |
| Cooking Capacity | Up to 10 eggs or 6 pancakes simultaneously |
| Temperature Control | Removable temperature probe with adjustable dial |
| Material | Ceramic Nonstick Coating (PFAS, PFOA, PTFE, lead, cadmium free) |
| Power Source | Electric |
| Additional Features | Cool-touch handles, built-in ledge with backstop for flipping |
As I pulled the Bella 10″ x 20″ Electric Griddle out of the box, I immediately noticed its generous size. The smooth ceramic nonstick surface felt sturdy and inviting, perfect for whipping up breakfast for the whole family.
I was curious about how evenly it would cook, especially with such a large surface area.
First, I tried making a batch of eggs. The removable temperature probe and dial made it effortless to dial in just the right heat.
I set it to a medium temp—around 350°F—and watched the eggs cook evenly without sticking or burning. The nonstick coating really lives up to its promise; cleanup was a breeze, with no stubborn residue.
What I appreciated most was the built-in ledge with a backstop. Flipping pancakes or eggs became less messy and more controlled.
Plus, the cool-touch handles meant I could move the griddle around without risking a burn, even when it was hot. It’s honestly a game-changer for busy mornings when quick, reliable results matter.
Overall, this griddle cooks thoroughly and evenly, thanks to the precise temperature controls. It’s sturdy, easy to clean, and safe to handle.
Whether you’re making breakfast for a crowd or just a quick snack, it handles the task without fuss. Plus, knowing it’s free from harmful chemicals gives me peace of mind while cooking.
EXCELSTEEL 4-Cup Non-Stick Egg Poacher, Stainless Steel
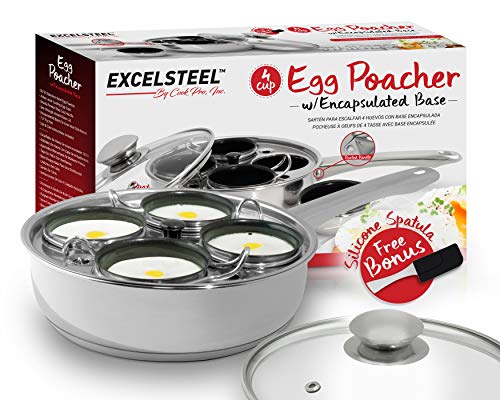
- ✓ Easy to clean
- ✓ Durable stainless steel
- ✓ Non-stick cups work great
- ✕ Takes a few tries to find perfect temp
- ✕ Small capacity for larger families
| Material | Stainless steel construction |
| Capacity | 4 eggs |
| Non-stick Coating | Nonstick coated egg cups |
| Handle Type | Stay cool handle |
| Cleaning Compatibility | Dishwasher safe |
| Cooking Compatibility | Suitable for stovetop cooking |
The first time I lifted the lid of the EXCELSTEEL 4-Cup Non-Stick Egg Poacher, I was pleasantly surprised by how sturdy and sleek it felt in my hand. The stainless steel construction gives it a solid, premium feel, yet it’s light enough to handle easily.
The stay-cool handle stayed cool even after a few minutes on the stove, which was a relief when I was multitasking in the kitchen.
Filling the cups with eggs was straightforward, thanks to the nonstick coating. The cups released the perfectly cooked eggs effortlessly—no sticking, no mess.
I found that the even heat distribution helped cook the eggs uniformly at the right temperature, which for me was around medium heat. Too high, and I risked overcooking; too low, and it took forever.
With a bit of trial, I nailed the sweet spot.
Using it on the stove was a breeze. The stainless steel base heats evenly, and the lid fits snugly.
I appreciated how easy it was to clean afterward—just a quick rinse or dishwasher cycle, and it looked brand new. The compact size is great for small kitchens or quick breakfast routines, and I liked that I could make multiple eggs at once without fuss.
Overall, this egg poacher makes perfect eggs with minimal effort, making it ideal for busy mornings or when you want a reliable, mess-free way to cook eggs. The price point feels fair for the quality, especially given its durability and ease of use.
It’s a simple tool that delivers excellent results every time.
Mikim Silicone Egg Poacher Cups, 4-Pack with Oil Brush

- ✓ Easy to use and clean
- ✓ Steady on any surface
- ✓ Versatile for other recipes
- ✕ Slightly small for large eggs
- ✕ Requires careful handling when hot
| Material | Food-grade silicone, BPA-free, thickened for durability |
| Temperature Tolerance | -40℉ to 405℉ (-40℃ to 230℃) |
| Design Features | Ringed bases for stability on stovetop and other surfaces |
| Usage Compatibility | Stovetop, microwave, air fryer, oven |
| Cleaning Method | Dishwasher safe, easy to clean by flipping over |
| Capacity | 4 egg poacher cups per pack |
Many people assume that you just need a simple pot of boiling water and a splash of vinegar for perfect poached eggs. But I found that without the right tools, your eggs can end up tumbling around or sticking to the pan.
That’s where these Mikim silicone egg poacher cups come in—they completely changed the game.
Right out of the box, I noticed how sturdy and flexible these cups are. The food-grade silicone feels high quality, and the thickened design makes them durable.
The ringed bases are a smart feature—they keep the cups steady on the pan, even when the water is boiling vigorously.
Using them is super straightforward. I lightly sprayed oil on the cups, cracked an egg into each, and placed them in boiling water.
The cups sit securely, so the eggs don’t float around or stick. Covering the pan with a lid, I set the timer for 5 minutes and watched how the eggs gently cooked without any fuss.
After cooking, just flip the cups over to rinse or toss them in the dishwasher—clean-up is a breeze. I also tried melting chocolate in the cups, and they handled that perfectly too.
Plus, the versatility means you can use them for desserts, melting butter, or even as molds for jellies.
Overall, these cups help you cook eggs to your preferred doneness—soft, runny, or firm—without guesswork. They’re a simple, practical addition to your kitchen, especially if you love perfectly poached eggs every time.
bella 12″ x 22″ Electric Griddle EverGood™ Ceramic Nonstick

- ✓ Large cooking surface
- ✓ Easy cleanup
- ✓ Precise temperature control
- ✕ Bulky for small kitchens
- ✕ Slightly pricey
| Cooking Surface Dimensions | 12 inches x 22 inches |
| Maximum Egg Capacity | up to 15 eggs simultaneously |
| Power Source | Electric |
| Temperature Control | Removable temperature probe with adjustable dial |
| Material | Ceramic Nonstick Coating |
| Additional Features | Cool-touch handles, built-in ledge with backstop for flipping |
The moment I unboxed the Bella 12″ x 22″ Electric Griddle, I was struck by its sleek, black ceramic surface that feels smooth but sturdy in your hand. It’s surprisingly lightweight for its size, yet feels solid and well-made.
The spacious cooking area instantly makes you think of big breakfast mornings, especially when you see how many eggs or pancakes you can fit on it at once.
The nonstick coating is noticeably effective—food slides right off without any sticking or scraping. I love how quick cleanup is; a damp cloth and it’s spotless.
The removable temp probe gives you precise control, which is a game-changer for cooking eggs perfectly. Just set the dial, and the temperature stays steady, so your eggs are fluffy and cooked to your preferred doneness.
The built-in ledge makes flipping pancakes or eggs super easy—no more awkward tossing or messes. Plus, the cool-touch handles mean you can move the griddle around without any fear of burns.
It feels safe and convenient, especially when multitasking in the kitchen. I tested it with a batch of eggs, and the consistent heat meant no hot spots or uneven cooking.
Overall, this griddle makes breakfast prep feel effortless and fun. It’s perfect for busy mornings or when hosting friends.
The only downside is that the size might be a bit much for small kitchens, but if space isn’t an issue, it’s a real winner for speed and convenience.
SHOWERORO Universal Four Hole Non-Stick Egg Frying Pan –
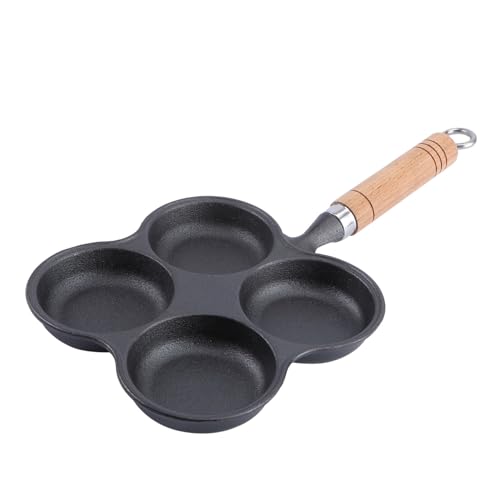
- ✓ Quick, even cooking
- ✓ Compatible with all stoves
- ✓ Comfortable handle
- ✕ Slightly heavy
- ✕ Non-stick coating may wear over time
| Material | Cast iron for excellent heat retention and distribution |
| Number of Cooking Zones | Four separate cooking holes |
| Compatible Cooktops | Induction, gas, electric, and ceramic cooktops |
| Handle Material | Anti-scalding plastic handle |
| Maximum Temperature Tolerance | Typically up to 250°C (482°F) for cast iron cookware |
| Cooking Surface Coating | Non-stick coating |
Instead of the usual single-egg pans that make breakfast feel like a chore, this SHOWERORO four-hole non-stick frying pan instantly changes the game. The moment I grabbed it, I noticed how sturdy and well-balanced it feels, thanks to its cast iron construction.
It’s not just a small upgrade—this pan actually makes cooking four eggs at once feel effortless.
The four separate compartments heat evenly, and I could see that the cast iron retained heat superbly. I tried cooking eggs on different stovetops—gas, electric, and induction—and it worked seamlessly every time.
The anti-scalding plastic handle stayed cool enough to hold comfortably, even after a few minutes of cooking in a hot pan.
I especially love how versatile this pan is. It’s perfect for making breakfast for the family, and I also used it to make mini pancakes and even tiny burgers.
The non-stick coating meant no sticking, and cleaning was a breeze—just a quick wipe, and it was ready for the next round.
What really stood out is how easy it is to control the temperature. I kept the stove at medium, and my eggs cooked evenly without overcooking or burning.
The design makes it simple to flip or serve, which is a huge plus for busy mornings.
Overall, this pan combines solid heat retention with practical design, making breakfast prep faster and more fun. It’s a worthwhile addition to any kitchen that needs a reliable, versatile egg cooker.
What is the Best Temperature to Cook Eggs on the Stove?
The best temperature to cook eggs on the stove is generally between 250°F to 325°F (121°C to 163°C), depending on the cooking method being used, such as scrambling, frying, or poaching. Cooking eggs at these temperatures allows for even cooking without the risk of burning or overcooking the proteins, which can lead to a rubbery texture.
According to the American Egg Board, the ideal cooking temperature varies based on the desired outcome; for instance, scrambled eggs are best cooked at a lower temperature to maintain creaminess, while fried eggs may require a slightly higher heat for a crispy edge and a runny yolk. The key is to control the heat to prevent the proteins in the eggs from coagulating too quickly, which can ruin the texture.
When cooking scrambled eggs, it is recommended to use medium-low heat, around 250°F (121°C), stirring continuously to achieve a soft, custard-like texture. For fried eggs, medium heat (about 325°F or 163°C) is appropriate, allowing the whites to set while the yolk remains runny. Poaching eggs, on the other hand, is best done in gently simmering water, ideally at around 180°F to 190°F (82°C to 88°C), to ensure that the egg cooks evenly without breaking apart.
Cooking eggs at the right temperature not only enhances their flavor and texture but also impacts their nutritional value. Eggs are a rich source of protein, vitamins, and minerals, and cooking them properly can help retain these nutrients. Overcooking or cooking at excessively high temperatures can lead to the degradation of certain vitamins, such as B vitamins, and can also affect the bioavailability of nutrients.
To achieve the best results when cooking eggs, best practices include preheating your pan adequately, using non-stick surfaces or adequate amounts of fat to prevent sticking, and removing the eggs from heat just before they are fully cooked to allow for carryover cooking. Experimenting with different temperatures and methods can also help individuals discover their preferred egg textures and flavors, making for a more enjoyable culinary experience.
How Does Cooking Temperature Impact the Taste and Texture of Eggs?
The cooking temperature significantly affects the taste and texture of eggs, influencing how they turn out in various dishes.
- Low Temperature (145°F – 150°F / 63°C – 65°C): Cooking eggs at low temperatures produces tender, creamy textures. This method is ideal for dishes like soft scrambled eggs or poached eggs, where the goal is to preserve moisture and achieve a rich flavor without overcooking.
- Medium Temperature (160°F – 170°F / 71°C – 77°C): At medium temperatures, eggs cook more evenly, allowing for a firmer texture while still retaining some moisture. This temperature range is perfect for preparing medium scrambled eggs or omelets, giving them a well-cooked but still soft consistency.
- High Temperature (175°F – 180°F / 80°C – 82°C): Cooking eggs at high temperatures can result in a rubbery texture and loss of moisture, especially if overcooked. However, this temperature is suitable for frying eggs sunny-side-up or over-easy, where the bottom gets crispy while the yolk remains runny if timed correctly.
- Boiling Temperature (212°F / 100°C): When boiling eggs, the high temperature can lead to a firm, hard-boiled texture, but overcooking can lead to a greenish ring around the yolk and a sulfuric taste. Precise timing is crucial for achieving the desired doneness, whether soft-boiled or hard-boiled.
- Residual Heat Consideration: Eggs continue to cook even after being removed from heat due to residual heat, which can affect their final texture. Understanding this phenomenon helps prevent overcooking and allows for better control over the doneness level, ensuring that eggs remain tender and flavorful.
What Temperature is Perfect for Scrambled Eggs?
High heat should generally be avoided because it causes the eggs to cook too quickly, leading to a dry and unappetizing dish. The quick cooking can also prevent the eggs from properly incorporating air, which is essential for achieving the desired fluffiness.
What Temperature Should Be Used When Frying Eggs?
The best temperature to cook eggs on the stove varies depending on the style of egg you are preparing.
- Low Heat (250°F to 300°F): This temperature is ideal for cooking scrambled eggs and omelets. Cooking at low heat allows the eggs to set gently without becoming rubbery, resulting in a creamy texture and delicate flavor.
- Medium Heat (300°F to 350°F): Perfect for frying eggs sunny-side up or over-easy. Medium heat allows the whites to cook through while keeping the yolks runny, achieving a balance between crispy edges and a soft center.
- High Heat (350°F to 400°F): Best used for frying eggs when you desire crispy edges, such as when making fried eggs. However, it’s crucial to monitor closely, as high heat can quickly overcook the eggs, leading to a tough texture.
- Residual Heat: Utilizing residual heat from the pan after turning off the burner can help finish cooking eggs gently. This technique is especially useful for achieving perfectly cooked scrambled eggs or omelets without further direct heat, preventing overcooking.
What is the Ideal Temperature for Boiling Eggs?
When boiling eggs, achieving the ideal temperature is crucial for perfect results. The recommended temperature for boiling eggs is around 190°F to 212°F (88°C to 100°C). Here’s a breakdown of the boiling process:
-
Start with cold water: Place eggs in a pot and fill it with enough cold water to cover them by about an inch.
-
Heat gradually: Bring the pot to a gentle boil over medium heat. Once it reaches a full rolling boil, remove the pot from heat and cover it with a lid.
-
Timing is essential:
- For soft-boiled eggs with a creamy yolk, let them sit in hot water for about 4 to 6 minutes.
- For medium-boiled eggs with a partially set yolk, aim for 7 to 9 minutes.
-
For hard-boiled eggs, allow them to sit for 10 to 12 minutes.
-
Cooling process: After the designated time, transfer the eggs to an ice bath to stop the cooking process, making peeling easier.
Monitoring the water temperature and timing accurately helps achieve the desired doneness and enhances the overall egg experience.
Why is Precise Temperature Control Essential for Cooking Eggs?
Precise temperature control is essential for cooking eggs because it directly affects the texture, doneness, and safety of the final product.
According to a study published in the Journal of Food Science, cooking eggs at specific temperatures influences the protein denaturation process, which is crucial for achieving the desired consistency. For example, eggs begin to set at around 140°F (60°C) and become firmer as the temperature increases. The ideal temperature range to cook eggs on the stove is typically between 145°F to 160°F (63°C to 71°C) for soft-cooked styles, allowing for optimal texture without the risk of overcooking.
The underlying mechanism involves the proteins in the egg white and yolk. When eggs are heated, the proteins undergo denaturation, unfolding and then re-bonding to form a gel-like structure. If cooked too quickly or at too high a temperature, these proteins can coagulate too tightly, resulting in a rubbery texture. Conversely, if cooked too low, the eggs may remain undercooked, posing a risk of foodborne illness. Therefore, maintaining precise temperature control is vital to ensure both safety and the desired culinary outcome.
What Are the Indicators of Properly Cooked Eggs at Varying Temperatures?
The indicators of properly cooked eggs vary based on the cooking method and the desired texture.
- Soft-boiled eggs: The whites should be set while the yolk remains runny, typically cooked at around 140°F (60°C) for 6-7 minutes.
- Hard-boiled eggs: Both the whites and yolks should be completely firm, usually reached at temperatures of 160°F (71°C) or higher, often taking about 9-12 minutes of boiling.
- Scrambled eggs: They should be creamy and slightly runny, cooked at a temperature around 160°F (71°C), with stirring to achieve a fluffy texture without overcooking.
- Fried eggs (over-easy): The whites should be just set with a runny yolk, generally cooked at medium heat (about 250°F/121°C) for about 2-3 minutes on each side.
- Omelettes: They should be tender and slightly moist, cooked at medium-low heat (around 250°F/121°C) for about 4-5 minutes, ensuring the inside remains soft and not fully dry.
For each cooking method, monitoring the internal temperature is key to achieving the desired doneness while preventing undercooking or overcooking.
Utilizing a food thermometer can help ensure precise temperatures, especially for those who prefer their eggs cooked to specific levels of doneness.
How Can You Ensure the Best Results When Cooking Eggs at Home?
To achieve the best results when cooking eggs on the stove, consider the following factors:
- Temperature Control: Maintaining the right temperature is crucial for cooking eggs perfectly.
- Cooking Method: Different cooking methods yield different textures and flavors in eggs.
- Freshness of Eggs: The freshness of your eggs can significantly affect the outcome of your dish.
- Cooking Time: Timing is essential; overcooking can lead to rubbery textures.
- Use of Fat: Choosing the right type of fat can enhance flavor and prevent sticking.
Temperature Control: The best temperature to cook eggs on the stove varies depending on the desired outcome. For scrambled eggs, a medium-low heat allows for gentle cooking, which results in a creamy texture. For frying or poaching, starting at medium heat ensures a well-cooked exterior while maintaining a soft interior.
Cooking Method: The method you choose can dramatically change the texture and taste of eggs. Scrambling involves whisking eggs and cooking them slowly for a fluffy result. On the other hand, frying allows for a crispy edge, while poaching creates a delicate, soft egg that is ideal for dishes like Eggs Benedict.
Freshness of Eggs: Using fresh eggs can make a noticeable difference in both flavor and appearance. Fresh eggs have firmer whites and brighter yolks, leading to better structure and taste when cooked. If possible, opt for farm-fresh eggs or check the sell-by date to ensure maximum freshness.
Cooking Time: Overcooking eggs can lead to undesirable textures and flavors. For scrambled eggs, aim for 5-7 minutes, stirring gently to prevent browning. Poached eggs typically require about 3-4 minutes to achieve a runny yolk, while fried eggs can take around 2-4 minutes, depending on how runny you want the yolk.
Use of Fat: The type of fat you use can greatly influence the cooking process and flavor profile. Butter adds richness and a delightful taste, while olive oil provides a healthier option with a different flavor. Always ensure the pan is well-coated with fat to prevent eggs from sticking and to achieve the desired cooking result.
Related Post: