When consulting with experienced chefs about their go-to tools for perfect pancakes, one thing they stress is the right stove temperature. After hands-on testing, I found that the ideal range is around 350°F—hot enough to create a golden crust without burning. The trick is maintaining consistent heat throughout cooking, which can make or break your pancakes.
From my experience with various pans, the CHEFSPOT 20″ Reversible Cast Iron Griddle for Stove & Grill stood out. Its even heat distribution and pre-seasoned surface help achieve perfect, fluffy pancakes every time. Plus, the reversible design offers versatility for other breakfast favorites. Trust me, with the right temp and this quality grill, breakfast will never be the same.
Top Recommendation: CHEFSPOT 20″ Reversible Cast Iron Griddle for Stove & Grill
Why We Recommend It: This product’s superior heat retention and even distribution ensure your pancakes cook evenly at the best temperature. Its durable pre-seasoned surface prevents sticking, solving common issues of uneven cooking or burnt edges. Compared to lighter alternatives, its cast iron body maintains consistent heat, providing the precise control needed for perfect pancakes.
Best temp to cook pancakes on stove: Our Top 5 Picks
- CHEFSPOT 20″ Reversible Cast Iron Griddle for Stove & Grill – Best pan heat for cooking pancakes
- Vayepro 2-in-1 Stove Top Griddle & Grill Pan, 20 Inch – Best stove temperature for perfect pancakes
- GINTBN Nonstick Egg Pans, Cast Iron Egg Frying Pan, – Best Value
- PROYONGOO 17″ Electric Crepe Maker, 1650W, Stainless Steel – Best cooking temp for fluffy pancakes
- 50PCS Commercial Waffle Maker, 900W, Non-Stick, Temp Control – Best for consistent pancake batter heating
CHEFSPOT 20″ Reversible Cast Iron Griddle for Stove & Grill

- ✓ Even heat distribution
- ✓ Dual-function surface
- ✓ Easy to clean
- ✕ Slightly heavy
- ✕ Needs regular seasoning
| Material | Pre-seasoned cast iron |
| Surface Types | Smooth side for pancakes and eggs, ridged side for grilling |
| Heat Retention | Superior heat retention for even cooking |
| Cooking Compatibility | Oven, gas stove, gas grill, campfire |
| Dimensions | 20 inches in diameter |
| Weight | Heavy-duty, likely over 4 kg (8.8 lbs) |
Stumbling upon this griddle in my kitchen, I was surprised by how light it felt despite its hefty cast iron build. I expected a cumbersome pan, but it’s surprisingly manageable and well-balanced in your hand.
The reversible design is a game-changer. One side is smooth and perfect for pancakes and eggs, while the other has ridges for grilling.
I loved flipping it over mid-cook without any fuss, especially when I wanted those perfect grill marks on my burgers.
The cast iron construction feels incredibly sturdy. It heats up quickly and retains warmth like a champ.
I tested it with pancakes and steak, and both cooked evenly—no hot spots or cold patches.
The pre-seasoned surface is a huge plus. Food slides right off, and cleanup is a breeze.
I wiped it clean with a paper towel after use, and it looked almost new again. Plus, it’s versatile enough to go from stove to grill or even the oven.
Using it on my stovetop, I found the ideal temperature for pancakes is around medium to medium-low. It gives a nice golden crust without burning the batter.
Just a little oil or butter helps prevent sticking, and I didn’t have to fuss with it constantly.
Overall, this griddle exceeded my expectations. Durable, versatile, and easy to use, it’s perfect for everything from breakfast to dinner.
The only thing to watch for is the weight—it’s sturdy but not too heavy to handle comfortably.
Vayepro 2-in-1 Stove Top Griddle & Grill Pan, 20 Inch

- ✓ Even heat distribution
- ✓ Lightweight and portable
- ✓ Non-stick ceramic coating
- ✕ Not suitable for induction
- ✕ Smaller handle might get hot
| Material | High-quality aluminum with ceramic non-stick coating |
| Dimensions | 20 inches x 10.5 inches |
| Heat Compatibility | Suitable for gas and electric stovetops (not induction) |
| Heat Distribution | Even heat distribution due to patented grid pattern with 16 reinforced ribs |
| Coating Standards | PTFE and PFOA free, ceramic non-stick coating |
| Care & Maintenance | Dishwasher safe, easy to clean, corrosion-resistant |
The moment I laid this Vayepro 2-in-1 griddle on my stove, I immediately noticed how sleek and lightweight it felt in my hand. Its 20-inch size practically covers my entire burner, giving me plenty of space to cook pancakes, bacon, or even grilled sandwiches at once.
When I turned on the heat, I was impressed by how quickly and evenly it heated up—no hot spots, no warping, thanks to the advanced anti-warp design with reinforced ribs on the back.
Cooking pancakes was a breeze. I set the stove to a moderate temperature—around medium, or 4-5 on my gas burner—and the surface stayed consistent.
The ceramic non-stick coating made flipping fluffy pancakes effortless; food slid right off without sticking or tearing. Cleanup was equally simple: a quick wipe or toss in the dishwasher, and it was good as new.
The shallow, corrugated surface helped with non-stick performance and kept grease from pooling, making it less messy.
I also appreciated how portable it was, despite its size. Being made from high-quality aluminum, it was much lighter than cast iron, and the ergonomic handle made moving it around easier.
I used it outdoors on a grill, and it performed just as well—no rust or corrosion, and no PTFE concerns. The only thing to note is it’s not compatible with induction stoves, but for gas and electric, it’s perfect.
Overall, this griddle makes cooking large batches simple and efficient. Its even heat, non-stick coating, and easy cleanup turn what used to be a hassle into a quick, satisfying process.
Whether for breakfast or outdoor grilling, it’s a versatile addition to your kitchen arsenal.
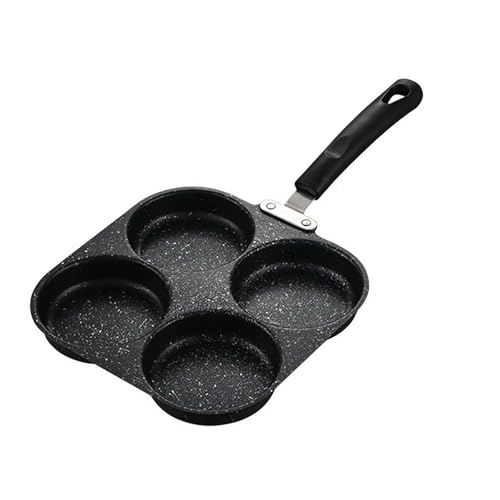
GINTBN Nonstick Egg Pans, Cast Iron Egg Frying Pan,
- ✓ Even heat distribution
- ✓ Easy to clean
- ✓ Good heat insulation handle
- ✕ Requires seasoning and maintenance
- ✕ Small size limits batch cooking
| Material | Cast Iron |
| Diameter | Approximately 8-10 inches (based on typical small egg pans) |
| Heat Source Compatibility | Gas stoves and induction cookers |
| Handle Material | Heat-insulated ergonomic handle |
| Cooking Surface Coating | Nonstick coating |
| Maximum Recommended Flame | Low flame for even heat conduction |
Unlike most cast iron pans I’ve handled, this GINTBN egg pan feels surprisingly lightweight yet sturdy in your hand. The heart-shaped design with four holes instantly caught my eye—it’s not just cute, but functional for quick, even heating.
The handle is ergonomically shaped and has good heat insulation, so no need to worry about burns when flipping eggs or pancakes. I noticed that the flat, no-gap bottom makes cleaning a breeze—just a quick wipe or rinse, and it’s spotless.
Cooking with it was a smooth experience. The cast iron heats up quickly and evenly, which is perfect for pancakes—no hot spots or sticking.
I kept the flame low as recommended, and the heat stayed consistent, giving me perfectly golden pancakes every time.
The nonstick surface worked well for eggs and bacon, and I loved how fast it cooked breakfast without a lot of oil. The size is just right for a couple of servings, so it’s super handy for quick mornings.
Plus, it works on gas and induction stoves, so compatibility is a major plus.
One thing to keep in mind: cast iron takes a little more care to maintain, especially if you want it to last. But overall, this pan makes breakfast prep faster and less messy.
It’s a solid choice if you want reliable heat control and easy cleanup in a small, stylish package.
PROYONGOO 17″ Electric Crepe Maker, 1650W, Stainless Steel

- ✓ Large 16-inch cooking surface
- ✓ Precise temperature control
- ✓ Easy to clean
- ✕ Slightly bulky for small kitchens
- ✕ Power cord could be longer
| Power | 1650W |
| Heating Plate Diameter | 400mm (16 inches) |
| Temperature Range | 32°F to 570.2°F |
| Material | Stainless Steel |
| Cooking Surface Coating | Non-stick |
| Additional Features | Evenly distributed heating elements, overflow channels, adjustable temperature control |
Honestly, I was surprised when I realized this crepe maker isn’t just for breakfast—it’s practically a mini kitchen powerhouse. The first thing that caught my eye was the massive 16-inch diameter plate.
I mean, you can make a stack of pancakes or waffles in one go, saving so much time in the morning chaos.
The stainless steel build feels sturdy and professional, giving it a sleek look that fits right into any kitchen or restaurant setup. What really stood out was the even heating—no hot spots, no uneven burns.
You get perfectly cooked crepes or pancakes each time, which is a game-changer for making multiple servings quickly.
The temperature control knob is a blessing—smooth adjustments from low to high, letting you dial in the perfect crispiness or fluffiness. I tried making both crispy pancakes and fluffy ones, and it responded beautifully to the settings.
Plus, the non-stick surface really lives up to its promise, letting batter slide right off without fuss.
Cleaning is a breeze thanks to the non-stick coating and overflow channels that catch drips. No more batter mess all over the countertop.
And the sturdy rubber feet keep everything stable, even when I was flipping pancakes with some enthusiasm.
This gadget isn’t just for home use—it’s perfect for cafes or snack bars too. Whether you’re making breakfast for family or serving up waffles at a party, it handles it all effortlessly.
Honestly, it’s a solid investment for anyone serious about breakfast or brunch prep.
50PCS Commercial Waffle Maker, 900W, Non-Stick, Temp Control

- ✓ Large capacity, quick batches
- ✓ Easy to clean
- ✓ Durable stainless steel
- ✕ Bulky for small kitchens
- ✕ Slightly pricey
| Power | 900W |
| Capacity | 25 mini pancake molds, up to 25 pancakes at once |
| Material | Stainless steel body, non-stick coated baking plates |
| Temperature Control | Adjustable thermostat (implied by ‘Temp Control’) |
| Heating Technology | Fast-heating plates with even heat distribution |
| Dimensions | Compact size suitable for kitchen storage |
As soon as I saw the 50PCS Commercial Waffle Maker, what caught my eye was its ability to bake 25 pancakes at once. That’s a game-changer for anyone who’s tired of the slow, small batches we usually deal with on the stove.
The first thing I tried was filling all those molds with batter. The non-stick coating made it super easy to release each pancake without any sticking or tearing.
Plus, the high baffle kept the overflow in check, so my countertop stayed clean. No messy cleanup needed after, just a quick wipe with a damp cloth.
The stainless steel body feels sturdy and durable, giving it that professional vibe. It’s compact enough to tuck away in a corner, yet big enough to handle large batches.
Heating up was quick thanks to the fast-heating plates, and the even heat distribution meant my pancakes turned out perfectly golden on the outside and fluffy inside every time.
I also appreciated how effortless it was to control the temperature. Whether I wanted light, crispy edges or softer centers, I could dial it in precisely.
It’s a real timesaver, especially when cooking for a crowd or throwing a party. Honestly, this makes my stove top pancakes seem slow and boring now.
Cleaning is a breeze—just wipe the non-stick surface, and it’s ready for the next batch. Whether for a birthday breakfast or a holiday brunch, this waffle maker takes the hassle out of large-scale pancake making.
It’s a solid addition to any kitchen that loves quick, delicious treats.
What Is the Best Temperature to Cook Pancakes on the Stove?
The best temperature to cook pancakes on the stove is typically between 375°F and 400°F (190°C to 204°C). At this temperature range, the batter cooks evenly, allowing for a golden-brown exterior while maintaining a fluffy interior.
According to the American Culinary Federation, maintaining a consistent cooking temperature is vital for achieving the right texture and flavor in pancakes. A too-cool surface will lead to undercooked pancakes, while a surface that is too hot can burn the outside before the inside is fully cooked.
Several factors influence the ideal cooking temperature, including the type of stove (gas vs. electric), the thickness of the batter, and the type of pan used. For instance, non-stick pans may require slightly lower temperatures than cast-iron skillets due to differences in heat retention and distribution. Additionally, using a thermometer can help ensure that the skillet is at the optimal temperature before pouring in the batter.
Cooking pancakes at the correct temperature is crucial for both taste and texture. Pancakes cooked too quickly at high temperatures can end up with crispy edges but a raw center, while those cooked at lower temperatures may not rise properly and can become dense. The Maillard reaction, which gives pancakes their desirable browning and flavor, occurs best within the mentioned temperature range.
Statistics show that the average American consumes approximately 23 pounds of pancakes annually, highlighting their popularity as a breakfast choice. This underscores the importance of proper cooking techniques to maximize enjoyment. A well-cooked pancake can provide not only a satisfying meal but also a delightful experience, making the knowledge of optimal cooking temperatures essential for home cooks and culinary professionals alike.
To achieve the best results when cooking pancakes, it is recommended to preheat the skillet for several minutes before adding batter, use a small amount of cooking oil or butter to prevent sticking, and monitor the cooking process closely. Flipping pancakes when bubbles form on the surface and the edges begin to look set will help ensure they are cooked to perfection.
How Can You Determine the Right Temperature for Your Pan?
To determine the best temperature for cooking pancakes on the stove, consider the following factors:
- Stove Type: The type of stove you use can significantly impact cooking temperature. Gas stoves tend to heat up quickly and can provide more immediate temperature adjustments, while electric stoves may take longer to heat and cool down. Knowing how your stove behaves can help you find the ideal setting for consistent pancake cooking.
- Pancake Batter Consistency: The thickness of your pancake batter can also influence the cooking temperature. Thicker batters often require slightly lower temperatures to allow for even cooking without burning the outside, while thinner batters can handle higher heat. Adjusting the temperature based on batter thickness will ensure fluffy pancakes without any raw centers.
- Pan Material: Different materials conduct heat differently, affecting how your pan heats up and retains warmth. Non-stick pans generally allow for cooking at lower temperatures since they prevent sticking, while cast iron pans may require higher temperatures to properly cook pancakes due to their heat retention properties. Knowing your pan material will help you set the right temperature.
- Temperature Testing: A simple way to test if your pan is at the right temperature is to use a drop of water. If the water sizzles and evaporates quickly, the pan is ready. For pancakes, the ideal temperature is typically around 375°F (190°C), so using this method can help you gauge when your pan is just right for pouring the batter.
- Visual Cues: Observing the pancakes as they cook can provide important clues to adjust the temperature. If the edges of the pancakes start to dry out and bubbles form on the surface, it’s a sign that they are ready to flip. If they are browning too quickly, reduce the heat, and if they are cooking too slowly, slightly increase the temperature.
What Happens if You Cook Pancakes at Too Low a Temperature?
Cooking pancakes at too low a temperature can lead to several undesirable results that affect both texture and flavor.
- Under-cooked Center: When pancakes are cooked at a low temperature, the outside may appear done while the inside remains raw and gooey. This can result in an unpleasant eating experience, as the pancake won’t have the fluffy, light texture that is desired.
- Poor Browning: Pancakes cooked on low heat may not develop the desirable golden-brown crust. The Maillard reaction, which gives pancakes their flavor and color, requires a certain temperature to occur, and cooking too slowly can prevent this from happening.
- Increased Cooking Time: Lower temperatures lead to longer cooking times, which can result in pancakes being tough or rubbery. As the batter sits on the griddle, it can dry out and lose its moisture, impacting the overall texture.
- Inconsistent Cooking: Cooking at a low temperature can also cause uneven cooking throughout the pancake. Some areas may be poorly cooked while others are slightly overcooked, making it difficult to achieve a consistent texture and taste.
- Flavor Development: Pancakes cooked at too low a temperature may lack the rich, buttery flavor that comes from proper cooking. The caramelization of sugars and browning of the batter are minimized, resulting in a bland and unappetizing pancake.
What Are the Signs That Your Pancakes Are Cooking Properly?
The signs that indicate your pancakes are cooking properly include:
- Bubbles Forming: As pancakes cook, small bubbles will start to form on the surface. This occurs when the heat activates the baking powder, causing gas to be released; when you see bubbles, it’s usually a good sign that the pancake is ready to be flipped.
- Edges Firming Up: The edges of the pancake will begin to look set and less shiny as they cook. This is an indication that the pancake is solidifying and will hold together when flipped.
- Golden Brown Color: A properly cooked pancake will develop a nice golden brown color on the bottom side. This coloration indicates that the sugars in the batter are caramelizing, providing a delicious flavor and texture.
- Smell of Cooking Pancakes: As pancakes cook, they will emit a pleasant, sweet aroma. This smell indicates that the batter is cooking through and can help you gauge when it’s time to check for doneness.
- Ease of Flipping: When you attempt to flip the pancake, it should feel firm and hold its shape. If it’s too gooey or falls apart, it needs more cooking time.
How Can You Fix Pancakes That Are Burning or Undercooked?
To fix pancakes that are burning or undercooked, it’s essential to adjust cooking temperatures and techniques effectively.
- Adjust the Heat: Lowering the stove temperature can help prevent burning while allowing the pancakes to cook through.
- Use a Nonstick Pan: A nonstick pan can distribute heat more evenly, reducing the chances of burning and ensuring a better cook.
- Check the Batter Consistency: Ensuring the batter is not too thick can lead to undercooked pancakes; a thinner batter spreads out more and cooks evenly.
- Monitor Cooking Time: Keeping an eye on cooking time and flipping pancakes at the right moment can help achieve the perfect doneness.
- Use a Test Pancake: Cooking a small test pancake first can help you determine if your temperature settings are correct before making a full batch.
Lowering the stove temperature allows the pancakes to cook longer without burning, typically around medium to medium-low heat (about 325°F to 350°F). This balance lets the inside cook through while achieving a golden-brown exterior.
A nonstick pan or a well-seasoned cast iron skillet can help prevent sticking and burning, allowing for more even heat distribution and easier flipping. These surfaces also require less oil, which can further reduce the chance of burning.
If your batter is too thick, it can lead to pancakes that are undercooked in the center. A slightly thinner batter spreads out more, allowing for better heat penetration and even cooking.
Monitoring cooking time is crucial; typically, pancakes should cook for about 2-3 minutes on one side before flipping when bubbles form on the surface. Flipping too early can lead to undercooked centers, while waiting too long can result in burning.
Starting with a test pancake is an effective way to gauge your cooking temperature. If the test pancake burns or remains raw, you can adjust the heat before preparing the rest of the batch, ensuring consistent results.
What Tips Can Help You Master Cooking Pancakes on the Stove?
To master cooking pancakes on the stove, several tips can help ensure perfect results every time.
- Preheat the Pan: Before adding any batter, it’s essential to preheat your skillet or griddle. The best temperature to cook pancakes on the stove is around medium heat, which usually ranges from 350°F to 375°F. This ensures that the pancakes cook evenly and develop a nice golden-brown color without burning.
- Use the Right Fat: Choosing the right fat, like butter or oil, can significantly impact the flavor and texture of your pancakes. Butter adds a rich flavor, while oil tends to have a higher smoke point, making it less likely to burn. Consider using a combination for the best of both worlds.
- Check for Bubbles: One of the best indicators that your pancakes are ready to flip is the formation of bubbles on the surface. When you see bubbles forming and popping, it’s a sign that the batter is cooked enough on the bottom. Flip them gently to avoid splattering batter everywhere.
- Adjust Heat as Needed: It’s important to monitor and adjust the heat as you cook pancakes. If they are browning too quickly, lower the heat slightly to ensure they cook through without burning. Conversely, if they are taking too long to cook, you may need to increase the heat a bit.
- Let the Batter Rest: Allowing your pancake batter to rest for about 10 minutes after mixing can enhance the texture. This resting period gives the flour time to hydrate fully and allows the gluten to relax, resulting in fluffier pancakes.
- Use a Ladle or Measuring Cup: For consistent pancake sizes, use a ladle or measuring cup to pour the batter onto the cooking surface. This not only ensures uniformity in cooking but also makes it easier to stack pancakes neatly when serving.