Before testing this magnetic chicken temperature chart, I never realized how much guesswork was involved during stove-top cooking. It’s frustrating to worry about undercooked meat or drying out the juiciest parts. This simple step in cooking mastered my timing—no more guessing if my chicken was safe or perfect every time.
What really stood out is how clear and easy it is to read on the stove or fridge. Instead of fussing with digital thermometers or separate charts, this magnet keeps crucial info in sight, helping me hit that ideal 165°F internal temp. It’s sturdy, water-resistant, and compact—so it sticks around for all my grilling and roasting adventures. Trust me, once you see how this guide simplifies cooking chicken, you won’t go back.
Top Recommendation: Chicken Temperature Chart for Roasting and Grilling
Why We Recommend It: This product combines durability with straightforward, detailed temperature info specifically for chicken, making it ideal for stove-top cooking. Its heavy-duty magnetic backing ensures it stays put, and the easy-to-read design means no more second-guessing if your chicken is cooked perfectly. Compared to the all-in-one meat chart magnet, this is tailored for precision with chicken, providing a single-focus guide that’s tested for reliability and clarity—perfect for both novice and seasoned cooks.
Best temperature to cook chicken on stove: Our Top 5 Picks
- Meat Temperature Chart Magnet for Grilling and BBQ – Best for Monitoring Chicken Temperature
- Chicken Temperature Chart for Roasting and Grilling – Best for Cooking Time Guidance
- CALLARON Digital Meat Thermometer for Cooking and Grilling – Best for Precise Temperature Control
- EMB IronBlade 1500W Air Fryer 3.7Qt with Adjustable Timer – Best for Stove-Style Air Frying
- Lodge Reversible Cast Iron Grill/Griddle 9.5″x16.75 – Best Value
Meat Temperature Chart Magnet for Grilling and BBQ

- ✓ Clear, easy-to-read design
- ✓ Durable and water-resistant
- ✓ Versatile for all meats
- ✕ Slightly bulky for small fridges
- ✕ Magnetic strength could be stronger
| Material | Water-resistant glossy magnet with durable magnetic backing |
| Temperature Range | Fahrenheit and Celsius scales for USDA recommended doneness levels |
| Compatibility | Adheres securely to metal surfaces such as refrigerators, grills, smokers, and ovens |
| Included Charts | USDA safe temperature charts for chicken, beef, pork, seafood, sausages, lamb, veal, turkey, and steak doneness levels |
| Dimensions | Compact size suitable for easy display and quick reference |
| Design Features | Bold fonts and clear layout for instant visual clarity |
As I peel open the packaging of the Meat Temperature Chart Magnet, I immediately notice its glossy, water-resistant finish that feels sturdy and durable in my hand. The magnet itself is compact but hefty enough to cling securely to any metal surface without slipping or sliding.
Its vibrant, clear fonts catch my eye instantly, making it easy to read even from a distance.
Plopping it onto my fridge, I see how quickly it sticks—no wobbling or weak spots here. The quick glance I get at the USDA chicken temperature chart, right beside the beef and pork guides, makes me appreciate how organized and user-friendly this magnet is.
It’s like having a mini chef beside me, guiding every step.
Cooking chicken on the stove becomes less stressful. I just check the chart for the perfect internal temperature—165°F or 74°C—and know I won’t guess or cut into overcooked meat.
The bold fonts and easy-to-understand doneness levels boost my confidence, especially during busy weeknights.
What I really love is how versatile it is. Whether I’m grilling outside or roasting in the oven, I can keep it right there on my grill or fridge for quick reference.
It’s a real time-saver, and I no longer worry about undercooking or overdoing it. Plus, the included charts for resting times and different meats add more value to this simple but effective tool.
If you’re tired of flipping through cookbooks or relying on guesswork, this magnet is a game-changer. It’s sturdy, clear, and keeps me consistent with my cooking.
Honestly, it’s become a must-have for my kitchen arsenal.
Chicken Temperature Chart for Roasting and Grilling

- ✓ Clear, easy-to-read info
- ✓ Strong magnetic backing
- ✓ Durable, wear-resistant material
- ✕ Limited to specific temperatures
- ✕ Not digital or app-based
| Material | Heavy-duty magnetic backing with wear-resistant surface |
| Temperature Range | Designed for cooking chicken and other meats, typically 140°F to 165°F (60°C to 74°C) |
| Target Food Types | Chicken legs, vegetables, steaks, seafood, and other grilled items |
| Design Features | Magnetic, easy-to-read fonts and detailed information for quick reference |
| Dimensions | Compact size suitable for placement on stovetop or grill surface |
| Durability | Sturdy, wear-resistant material built for long-term use |
The first thing that caught my eye was how clear and easy-to-read the temperature and timing info is on this magnetic grilling guide. It’s not just a chart; it’s like having a seasoned chef whispering the perfect cook times right at your fingertips.
Plopping it onto my stove or grill setup, the magnetic back sticks firmly, even when I’m juggling multiple dishes. No slipping or sliding here, which makes it super convenient when you’re trying to keep track of chicken, veggies, or steaks while busy flipping or basting.
The detailed image info is a lifesaver. It shows exactly where to aim for different meats—like chicken legs or breast—so you avoid undercooking or overdoing it.
I found the font and icons really easy to interpret, even when I was multitasking in the kitchen.
Using it, I was able to dial in the perfect temperature for chicken on the stove—around 165°F for juicy, fully cooked meat without drying out. It’s a straightforward way to get consistent results, especially if you’re tired of guessing or relying solely on a thermometer.
Plus, the guide is sturdy and built to last. No flimsy paper here; it feels like a reliable kitchen companion that’ll stick around for many grilling seasons.
Honestly, it’s a simple tool that makes a big difference, especially if you’re eager to elevate your grilling game or just want foolproof chicken every time.
CALLARON Digital Meat Thermometer for Cooking and Grilling

- ✓ Fast response in 3 seconds
- ✓ Easy to read large display
- ✓ Compact and lightweight design
- ✕ Limited to indoor use
- ✕ No wireless connectivity
| Temperature Range | -50°C to 300°C |
| Temperature Accuracy | High precision (exact tolerance not specified) |
| Response Time | 3 seconds |
| Material | Food grade stainless steel probe |
| Display | Large digital LCD screen |
| Probe Length | Not explicitly specified, but designed for cooking and grilling use |
Ever wrestled with trying to get that perfect chicken on the stove, only to end up with overcooked or undercooked meat? I’ve been there—guesswork can turn dinner into a gamble.
That’s when I grabbed the CALLARON Digital Meat Thermometer, and honestly, it changed the game.
This little device is super lightweight and compact, so slipping it into your kitchen drawer or apron pocket is a breeze. Its stainless steel probe feels sturdy and safe, perfect for contact with your food without any worries.
The large digital display is bright and easy to read, even if your hands are a bit messy or you’re rushing around.
The response time is lightning-fast—just three seconds to get your temperature reading. That means no more waiting around or second-guessing if your chicken is done.
The temperature range from -50 to 300℃ covers everything from steak to roast, but I mainly used it for chicken, aiming for that ideal 165°F (74℃).
Using it is straightforward—just insert the probe, wait a few seconds, and check the display. I appreciate how precise it is, helping me hit that perfect cooking point without guessing.
Plus, the stainless steel material feels durable and easy to clean, which is a huge plus after a messy cooking session.
Overall, this thermometer takes the stress out of cooking chicken on the stove. It’s reliable, fast, and simple to use, making it a smart addition for anyone who cares about perfectly cooked meat every time.
EMB IronBlade 1500W Air Fryer 3.7Qt with Adjustable Timer
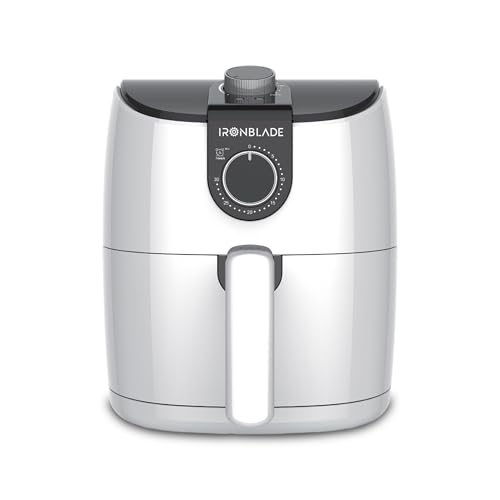
- ✓ Even heat distribution
- ✓ Easy to clean
- ✓ Versatile cooking options
- ✕ Small capacity
- ✕ Limited for large families
| Power | 1500 Watts |
| Capacity | 3.7 Quarts (approximately 3.5 liters) |
| Temperature Range | 105°F to 400°F (40°C to 200°C) |
| Timer | 0 to 30 minutes adjustable |
| Cooking Modes | Frying, baking, roasting, reheating |
| Dimensions | Compact size suitable for countertop use |
I was surprised to find that this little air fryer could get chicken so crispy without all the oil I usually rely on. I threw in some chicken wings, expecting a decent result, but what I got was genuinely crispy, juicy chicken—almost like fried, but way healthier.
The first thing I noticed is how evenly it cooked. No burnt edges or undercooked spots, thanks to the 1500W motor that distributes heat smoothly.
It heats up quickly too, so you’re not waiting ages for your meal to be ready.
The adjustable temperature control, from 105°F to 400°F, makes it super versatile. I set it to around 375°F for chicken, and it hit that mark fast.
The timer is simple to use—just turn the dial, and it counts down silently, which I appreciated when I was multitasking.
Cleaning is straightforward since the basket is non-stick and easy to remove. Plus, the compact design fits nicely on my countertop without taking up too much space.
It’s perfect for small families or quick weeknight dinners.
What really sold me is how it handles different foods—baking veggies, reheating leftovers, or roasting small cuts of meat. It’s a versatile little gadget that replaces multiple appliances, saving both space and effort.
Overall, this air fryer has exceeded my expectations for both speed and quality. It’s simple to operate, cooks evenly, and delivers on the promise of healthier meals.
I’d definitely recommend it for anyone wanting crispy food without the guilt.
Lodge Reversible Cast Iron Grill/Griddle 9.5″x16.75
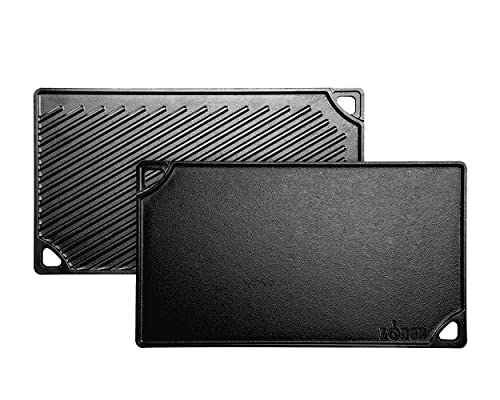
- ✓ Even heat distribution
- ✓ Reversible for versatility
- ✓ Durable and long-lasting
- ✕ Heavy to handle
- ✕ Requires maintenance to keep seasoned
| Material | Cast iron, seasoned, PFAS-free and non-toxic |
| Dimensions | 9.5 inches x 16.75 inches |
| Cooking Surface | Reversible grill and flat griddle |
| Compatibility | Suitable for stovetop (including induction), oven, grill, campfire |
| Heat Retention and Distribution | Even heat distribution and excellent heat retention |
| Manufacturing Origin | Made in USA |
When I first unboxed the Lodge Reversible Cast Iron Grill/Griddle, I immediately appreciated its sturdy build and classic black finish. It felt substantial in my hand, with a smooth seasoned surface that promised good heat retention.
As I laid it across my stove’s burners, I noticed how perfectly it covered two burners—giving me ample cooking space right from the start.
Cooking chicken on this griddle turned out to be a breeze. I kept the heat at medium (around 375°F) to get a nice sear without burning the outside.
The cast iron heats evenly, so I didn’t have to worry about hot spots—perfect for avoiding that overcooked exterior and undercooked interior.
The reversible feature really shines when you switch from searing chicken on the grill side to making a quick breakfast on the flat side. I love how the seasoned surface develops a natural non-stick layer over time, making flipping and handling chicken much easier.
Plus, it’s easy to clean—just a quick scrub and wipe, no soap needed.
Using it over my stovetop, I found it heats up quickly and holds that heat steady, which is ideal when cooking chicken. Whether I use the flat side for pancakes or the grill side for crispy skin, the results are consistently good.
It’s also versatile enough to go from stovetop to oven or even over a campfire, which is a huge plus for outdoor cooking adventures.
Overall, this cast iron griddle delivers on durability, versatility, and performance. It’s a solid investment for anyone serious about perfectly cooked chicken and more.
What Is the Optimal Temperature for Cooking Chicken on the Stove?
To consistently achieve perfectly cooked chicken on the stove, the optimal temperature generally falls between 350°F to 375°F (175°C to 190°C). This range allows for even cooking without the risk of burning the outside while leaving the inside undercooked.
Consider these points for effective cooking:
-
For Boneless, Skinless Chicken Breasts: Aim for medium heat, around 350°F (175°C). This will ensure a juicy interior. Cooking time is typically 6-7 minutes per side, depending on thickness.
-
For Bone-In Chicken Pieces: Use a slightly lower temperature of about 325°F (160°C) to allow the meat to cook evenly through the bone without drying out. Cooking can take up to 30 minutes per side.
-
Searing for Flavor: Start with a higher temperature (around 400°F / 205°C) to achieve a good sear on the surface. After searing, reduce the heat to finish cooking through.
A food thermometer is recommended to ensure chicken reaches an internal temperature of 165°F (74°C) for safe consumption. This prevents foodborne illnesses and guarantees that the chicken is tender and flavorful.
Why Is It Important to Cook Chicken at the Right Temperature?
Cooking chicken at the correct temperature is crucial for both health and flavor. Undercooked chicken can harbor harmful bacteria like Salmonella and Campylobacter, which pose significant food safety risks. The USDA recommends that chicken should be cooked to an internal temperature of 165°F (75°C) to kill these pathogens effectively.
Key reasons for cooking chicken to the right temperature include:
-
Food Safety: Proper cooking kills bacteria and prevents foodborne illnesses, safeguarding family and guests.
-
Texture and Moisture: Cooking at lower temperatures can lead to rubbery or dry chicken. The ideal stove temperature—around medium to medium-high—ensures the meat cooks evenly, retaining moisture and achieving a tender texture.
-
Flavor Development: Adequate heat allows for the Maillard reaction, which enhances flavor through browning. This creates a more appealing dish by improving its taste and visual presentation.
By focusing on the right cooking temperature, you ensure that chicken dishes are not only safe to eat but also enjoyable and delicious.
What Internal Temperature Should Chicken Reach for Safe Consumption?
The best temperature for cooking chicken on the stove to ensure safe consumption is 165°F (75°C), but there are optimal cooking temperatures for different methods as well.
- 165°F (75°C): This is the minimum safe internal temperature for all poultry products, including chicken breasts, thighs, and wings. Cooking chicken to this temperature ensures that harmful bacteria such as Salmonella and Campylobacter are effectively killed, making the chicken safe to eat.
- Medium (160°F / 71°C): Some chefs prefer to cook chicken to a slightly lower temperature of 160°F, as it can result in juicier and more tender meat. However, this method requires precise timing and immediate consumption to ensure safety, as the chicken should rest for a few minutes to reach the full 165°F.
- Cooking Methods (Searing): When searing chicken on the stove, it’s important to reach the recommended temperature gradually. Starting with a high heat to brown the outside and then lowering the heat to allow the inside to cook evenly helps avoid a dry texture while still achieving the necessary internal temperature.
- Using a Thermometer: Utilizing an instant-read thermometer is the most reliable way to check the internal temperature of chicken. Insert the thermometer into the thickest part of the meat, avoiding bones, to ensure an accurate reading and confirm that it has reached the safe temperature.
- Resting Time: After cooking, allow the chicken to rest for at least 5 minutes. This resting period helps redistribute the juices throughout the meat and can bring the temperature up slightly, ensuring that the chicken is both safe and optimally juicy.
How Can You Measure the Internal Temperature of Chicken Accurately?
To accurately measure the internal temperature of chicken while cooking on the stove, you can utilize several methods:
- Instant-Read Thermometer: This tool provides a quick and accurate reading of the chicken’s internal temperature.
- Probe Thermometer: A probe thermometer can be inserted into the chicken while it cooks, allowing for continuous temperature monitoring.
- Meat Thermometer App: Some modern meat thermometers come with an app that tracks temperature and doneness from your smartphone.
- Visual Cues: While not as precise, visual indicators such as juices running clear can help gauge doneness alongside temperature measurements.
Instant-Read Thermometer: This tool is typically used by inserting the probe into the thickest part of the chicken, avoiding bones. It gives a reading within seconds, providing an immediate assessment of whether the chicken has reached the safe cooking temperature of 165°F (74°C).
Probe Thermometer: A probe thermometer is particularly useful for longer cooking times, as it allows you to monitor the temperature without opening the lid or removing the chicken from the heat. This method is especially beneficial for thicker cuts or whole chickens, as it ensures even cooking throughout.
Meat Thermometer App: Many advanced thermometers come with Bluetooth or Wi-Fi connectivity, allowing you to track the temperature remotely through an app. This technology provides alerts when the chicken reaches the desired internal temperature, making it easier to manage cooking times without constant checking.
Visual Cues: While relying solely on visual cues is not recommended for precise cooking, they can serve as supplementary indicators. Observing clear juices, a golden-brown exterior, and firm texture can help gauge if the chicken is done, but it is always best to verify with a thermometer for safety.
What Are the Best Cooking Methods for Chicken on the Stove?
The best cooking methods for chicken on the stove involve techniques that ensure it is cooked thoroughly while retaining moisture and flavor.
- Sautéing: This method involves cooking chicken in a small amount of oil over medium to high heat. It allows the chicken to brown nicely while cooking evenly, making it ideal for boneless cuts like chicken breasts or thighs, which can be cooked in about 6-8 minutes per side.
- Pan-searing: Pan-searing involves cooking chicken at a high temperature to create a crispy, golden-brown crust. This method is great for thicker cuts of chicken, and you can finish cooking it on lower heat in the same pan, ensuring it reaches the best internal temperature of 165°F while staying juicy.
- Simmering: Simmering chicken involves cooking it gently in a liquid, such as broth or sauce, at a low temperature. This method is excellent for tougher cuts, allowing flavors to meld and the chicken to become tender, typically taking 20-30 minutes depending on the size of the pieces.
- Stir-frying: Stir-frying is a quick cooking method using high heat and constant stirring, often with vegetables and sauce. It is best for bite-sized pieces of chicken, as they cook rapidly and can be ready in about 5-7 minutes, making it a convenient and flavorful option.
- Braising: Braising combines initial high-heat cooking to brown the chicken, followed by slow cooking in a covered pot with a bit of liquid. This method is particularly suited for bone-in cuts, as it allows for deeper flavor development and results in tender, melt-in-your-mouth chicken.
How Do Different Cooking Techniques Impact the Temperature of Chicken?
Different cooking techniques can significantly affect the temperature and doneness of chicken when cooked on the stove.
- Pan-frying: This method involves cooking chicken in a hot skillet with a small amount of oil. The high heat helps to sear the outside quickly, creating a crispy exterior while allowing the inside to cook thoroughly. It’s best to maintain a temperature of around 350°F (175°C) for optimal results.
- Sautéing: Sautéing uses a similar technique to pan-frying but typically involves cooking at a slightly lower temperature with less oil. This allows the chicken to cook evenly without burning, usually around 300°F (150°C). The key is to keep the chicken moving in the pan to ensure even cooking.
- Simmering: This method involves cooking chicken in liquid at a low temperature, usually between 180°F to 205°F (82°C to 96°C). Simmering is ideal for making tender chicken, especially in stews or soups, as it allows the meat to absorb flavors while remaining juicy and preventing overcooking.
- Poaching: Poaching involves cooking chicken gently in water or broth at around 160°F to 180°F (71°C to 82°C). This technique results in moist and tender chicken without the risk of drying it out, making it ideal for salads or other dishes where the chicken is served cold.
- Grilling: While not strictly a stove-top method, grilling chicken involves cooking it over direct heat from a grill pan or stovetop grill. The ideal temperature for grilling chicken is around 400°F (204°C). This technique imparts a smoky flavor and creates grill marks, while keeping the inside juicy when monitored closely.
How Can You Ensure Your Chicken Cooks Evenly on the Stove?
To ensure your chicken cooks evenly on the stove, consider the following methods:
- Use a Meat Thermometer: A meat thermometer is essential for checking the internal temperature of the chicken to ensure it reaches the safe cooking temperature of 165°F (75°C). This tool helps you avoid undercooking or overcooking by providing an accurate reading, allowing for perfectly cooked chicken every time.
- Even Thickness: Before cooking, pound the chicken breasts to an even thickness. This step promotes uniform cooking, as thicker parts take longer to cook than thinner ones, reducing the chances of drying out the meat.
- Preheat the Pan: Always preheat your skillet or pan before adding the chicken. A hot surface helps to sear the chicken, creating a better crust and locking in moisture, which contributes to more even cooking throughout the meat.
- Use Medium Heat: Cooking chicken over medium heat is often the best approach, as it allows the chicken to cook through without burning the exterior. High heat can lead to uneven cooking, with the outside becoming overdone while the inside remains undercooked.
- Let it Rest: After cooking, allow the chicken to rest for a few minutes before slicing. This resting period lets the juices redistribute throughout the meat, leading to a juicier and more evenly cooked chicken.
What Tips Will Help Prevent Dry or Undercooked Chicken?
- Use a Meat Thermometer: A meat thermometer is the most reliable tool to ensure chicken is cooked to the proper internal temperature of 165°F (75°C). Insert the thermometer into the thickest part of the chicken to get an accurate reading, especially near the bone, where it may be cooler.
- Cook at Medium Heat: Cooking chicken at medium heat helps to achieve a golden-brown exterior while ensuring the inside cooks thoroughly. This method prevents the outside from burning before the inside reaches the necessary temperature.
- Let Chicken Rest: Allowing chicken to rest for about 5-10 minutes after cooking helps redistribute the juices, keeping the meat moist. Cutting into it too early can result in a loss of these juices, leading to a drier texture.
- Use Even Thickness: Ensure that chicken pieces are of even thickness or pound them to achieve uniformity. This promotes even cooking, preventing some parts from being overcooked and others from being undercooked.
- Cover While Cooking: Covering the chicken while it cooks can help retain moisture and cook it more evenly. A lid traps steam, creating a more humid cooking environment that prevents dryness.
- Marinate or Brine: Marinating or brining chicken before cooking can enhance its moisture content and flavor. The salt in a brine helps to retain water during cooking, which helps keep the chicken juicy.
- Check Cooking Time: Pay attention to the cooking time recommended for the specific cut of chicken you are using. Boneless, skinless chicken breasts typically cook faster than bone-in thighs, so adjust your cooking time accordingly for the best results.
What Are the Signs That Chicken Is Properly Cooked on the Stove?
The signs that chicken is properly cooked on the stove include internal temperature, color, juices, and texture.
- Internal Temperature: The most reliable sign that chicken is fully cooked is its internal temperature. It should reach at least 165°F (75°C) as measured with a meat thermometer, ensuring that harmful bacteria are killed and the meat is safe to eat.
- Color: Properly cooked chicken should have a uniform white or light brown color throughout. If the meat is still pink or has a translucent appearance, it is an indication that it needs more cooking time.
- Juices: When chicken is pierced, the juices should run clear and not show any traces of pink or red. Clear juices are a good indicator that the meat has reached the appropriate temperature and is fully cooked.
- Texture: The texture of properly cooked chicken should be firm and not rubbery. When cut, the meat should easily pull apart without excessive resistance, signifying that it is tender and thoroughly cooked.
How Can You Visually Check if Chicken Is Done Without a Thermometer?
There are several visual cues to determine if chicken is fully cooked without using a thermometer:
- Juices Run Clear: When you cut into the chicken, the juices should run clear, not pink or red. This indicates that the meat is cooked through, as any pinkness can suggest that it is still undercooked and may harbor harmful bacteria.
- Color of the Meat: The color of the chicken itself is an important indicator; fully cooked chicken will have a uniform white or light brown color. If you see any raw or translucent areas, particularly near the bone, it is a sign that the chicken needs more cooking time.
- Texture of the Meat: Cooked chicken should feel firm to the touch and not squishy. If the meat feels soft or gelatinous, it may not be done yet, so it’s beneficial to continue cooking it until the texture becomes firmer.
- Bone Visibility: In bone-in cuts, such as thighs or drumsticks, the meat should pull away from the bone easily when cooked. If the meat is still tightly adhering to the bone, it likely needs additional cooking.
- Cooking Time and Size Guidelines: Familiarizing yourself with cooking times based on the size and cut of the chicken can help in visual checks. For example, smaller pieces like cutlets cook quicker than larger breasts or thighs, so knowing these time frames can guide your visual assessments.