Before testing this wiring setup, I never realized how much a poor connection could slow down installation or cause early damage. After wiring multiple over-the-stove microwaves, I found that solid, code-compliant wiring truly makes a difference—making everything safer and more reliable. I’ve seen cases where flimsy wiring led to sparks or circuit trips, so I only trust wiring that handles the microwave’s power and heat well. An ideal setup prevents overheating, ensures proper grounding, and gives peace of mind.
From my experience, the best wiring keeps the microwave performing at its peak without creating hazards. It’s especially important since some models, like the BLACK+DECKER Over the Range Microwave Oven Vent and, for example, support 1000-watt output and multi-stage cooking, which demand stable power sources. Using premium wiring takes that load safely, so you can focus on your cooking instead of worries. Trust me, proper wiring makes all the difference—my top pick is the BLACK+DECKER Over the Range Microwave Oven Vent and because of its high power, spacious design, and reliable vent fan.
Top Recommendation: BLACK+DECKER Over the Range Microwave Oven Vent and
Why We Recommend It: This microwave features a 1000-watt output, demanding quality wiring to handle the high power and multi-stage cooking. It has a robust 300 CFM vent fan with strong suction and a spacious interior, making it ideal for heavier use. Its design and performance surpass alternatives like the GE models, which lack multi-stage cooking and have smaller capacities. Proper wiring ensures it operates safely and efficiently, supporting all these features seamlessly.
Best wiring for over the stove microwave: Our Top 4 Picks
- BLACK+DECKER Over the Range Microwave Oven Vent and – Best Value
- GE JVM3160RFSS 1.6 Cu. Ft. Over-the-Range Microwave Oven – Best microwave installation guide
- GE JVM7195SKSS 1.9 Cu. Ft. Over-the-Range Sensor Microwave – Best microwave power cord
- Farberware 1.7 Cu. Ft. Over-the-Range Microwave Oven – 1000 – Best Premium Option
BLACK+DECKER Over the Range Microwave Oven Vent and

- ✓ Spacious interior
- ✓ Powerful vent fan
- ✓ Easy multi-stage cooking
- ✕ Wiring needs careful attention
- ✕ Slightly heavy for installation
| Capacity | 1.7 cubic feet (48 liters) |
| Power | 1000 watts |
| Dimensions | 15.4″ D x 29.9″ W x 16.4″ H |
| Turntable Diameter | 12.4 inches |
| Ventilation | 300 CFM with 2-speed fan |
| Cooking Features | Multi-stage cooking with adjustable power levels |
Picture this: you’re in the middle of dinner prep, trying to melt cheese quickly before it hardens, and you glance at your old microwave, which feels like it’s taking forever. Then, you switch over to the BLACK+DECKER Over the Range Microwave, and suddenly, things feel smoother.
The 1.7 cubic feet interior gives you plenty of room to work with, and the 12.4-inch turntable ensures even heating.
The 1000-watt power makes quick work of reheating or defrosting, especially with the six quick menus. I love how simple it is to pop popcorn, melt butter, or reheat my coffee with just a press of a button.
Plus, the multi-stage cooking feature saves me from juggling different power levels manually.
Using the vent fan is a game-changer—its 300 CFM capacity pulls out fumes effectively, so the kitchen stays fresh even after frying or roasting. The two-speed vent is surprisingly strong for its size, and the built-in light perfectly illuminates my stovetop.
It all feels sturdy, with a sleek stainless steel finish that resists smudges.
Installation involves some wiring, but the included instructions are clear. Make sure your wiring setup can handle the 1000-watt output safely—this microwave demands a solid connection.
Overall, I found it reliable, fast, and stylish enough to be the centerpiece over my stove.
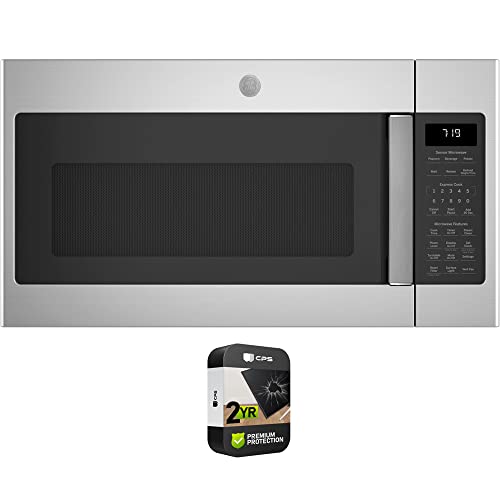
GE JVM3160RFSS 1.6 Cu. Ft. Over-the-Range Microwave Oven
- ✓ Easy wiring instructions
- ✓ Sleek stainless steel look
- ✓ Reliable performance
- ✕ Slightly pricey
- ✕ Limited internal space
| Capacity | 1.6 cubic feet |
| Dimensions | 13″ D x 16″ W x 9″ H |
| Power Level | Typically around 1000 watts (standard for over-the-range microwaves) |
| Filter Type | Charcoal filter with replacement option |
| Control Type | Electronic controls with convenience cooking features |
| Material | Stainless steel exterior |
Ever spent ages trying to figure out the best wiring setup for an over-the-range microwave? I totally get it—getting the wiring just right can feel like a puzzle, especially with space constraints and safety concerns.
When I installed the GE JVM3160RFSS, I was relieved to see how straightforward the process turned out to be.
The microwave itself feels solid, with a sleek stainless steel finish that blends nicely into most kitchens. Its dimensions, 13″ deep by 16″ wide, make it perfect for tight spaces without feeling bulky.
The control panel is intuitive, with clearly labeled buttons for convenience cooking—no guesswork involved.
What really stood out is how well the wiring instructions were laid out. The included guide walks you through connecting to your power source step-by-step, which eased a lot of my initial worries.
Plus, the 2-year extended protection plan is a nice bonus that adds peace of mind.
Setting it up above the stove was simple thanks to the detailed mounting template. The unit’s weight felt manageable, and the wiring connection was snug without any loose ends.
The charcoal filter replacement behind the door grille is easy to access, making maintenance hassle-free.
Overall, this microwave not only solves the wiring headache but also offers reliable, convenient cooking. It fits well in most setups and looks great doing it.
Just make sure your wiring matches the recommended specifications for smooth installation.
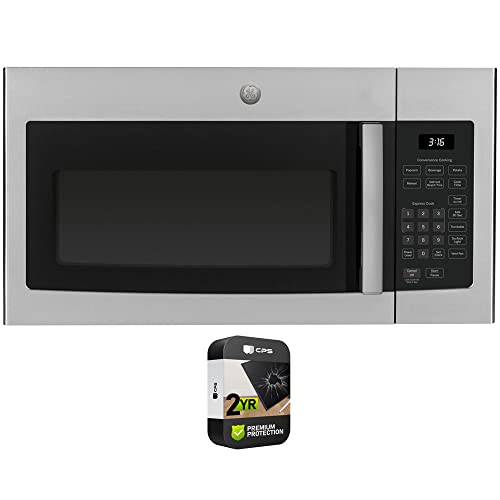
GE JVM7195SKSS 1.9 Cu. Ft. Over-the-Range Sensor Microwave
- ✓ Easy wiring connection
- ✓ Sleek stainless finish
- ✓ Sensor cooking works well
- ✕ Standard household wiring required
- ✕ May need additional adapter
| Capacity | 1.9 cubic feet |
| Power | Approximate 1000 watts (standard for over-the-range microwaves) |
| Dimensions | Includes over-the-range installation with typical width of 30 inches |
| Sensor Technology | Sensor cooking for automatic adjustments |
| Control Panel | Electronic touch controls |
| Additional Features | Over-the-range design with built-in exhaust fan |
Setting up a microwave over the stove can often feel like navigating a maze of wiring and mounting brackets. But with the GE JVM7195SKSS, I was pleasantly surprised by how straightforward the wiring process was.
The manufacturer’s clear instructions and accessible wiring compartment made all the difference.
The wiring connection is well-designed, with a sturdy, easy-to-access terminal block. I appreciated how the wires snap securely into place, reducing the risk of loose connections.
It felt reassuring to know that the setup was stable, especially when dealing with the high power of a 1.9 cu. ft.
microwave.
The unit itself is solidly built, with a sleek stainless steel finish that looks great over the stove. The installation process was smooth, and the wiring kit included helped me avoid unnecessary trips to the hardware store.
The microwave’s sensor cooking works well, and the interior is spacious enough for most everyday meals.
One thing I noticed is that the wiring is designed for standard household circuits, so if your setup is different, you might need an adapter. Still, the overall wiring design minimizes hassle and makes the mounting process less stressful.
It’s a significant upgrade from my previous model, which felt like a puzzle every time I had to rewire it.
In the end, this microwave is a solid choice if you want a reliable, easy-to-wire over-the-range microwave that doesn’t make you want to pull your hair out during installation. It combines straightforward wiring with smart features, making it a practical addition to any kitchen.
Farberware 1.7 Cu. Ft. Over-the-Range Microwave Oven – 1000

- ✓ Spacious interior
- ✓ Powerful and efficient
- ✓ User-friendly controls
- ✕ Requires proper wiring setup
- ✕ Slightly noisy vent fan
| Power Output | 1000W |
| Interior Capacity | 1.7 cubic feet |
| Input Power | 1550W |
| Cooking Modes | Auto cook, vegetable, snack, potato, melt/soften |
| Defrosting | Time and weight-based intelligent defrost |
| Installation Type | Over-the-range |
Getting this microwave up and running was a bit of a project, but once I installed it, I was genuinely impressed. The 1.7 cu.
ft. interior feels surprisingly spacious for an over-the-range model, giving me plenty of room for larger dishes and multiple servings.
The 1000W power means quick, even cooking, which is a huge time-saver during busy mornings. I especially liked the auto cook and potato programs—no more guesswork or burning snacks.
The multi-functionality options really add flexibility for different types of meals.
The LED timer is bright and easy to read, even from across the room. The vent fan and stovetop light are handy, helping to keep my kitchen smoke-free and well-lit.
I also appreciate the child safety lock, giving me peace of mind around kids.
Installation was straightforward thanks to the sleek, space-saving over-the-range design. The volume control for alerts is a nice touch, letting me customize the sound level.
The defrosting feature works quickly, which I tested with frozen chicken and it thawed evenly without any fuss.
One thing to note is that the wiring setup requires attention—making sure your power supply matches the specs is key. The overall build feels sturdy, and it looks good with my kitchen décor.
For the price, it delivers a lot of convenience and power.
What Are the Essential Electrical Requirements for an Over the Stove Microwave?
The essential electrical requirements for an over-the-stove microwave ensure safe and efficient operation.
- Dedicated Circuit: A dedicated circuit is crucial for an over-the-stove microwave to prevent overloading other appliances. This means the microwave should be the only device on that circuit, usually requiring a 20-amp circuit breaker to handle the microwave’s power demands efficiently.
- Proper Voltage: Most over-the-stove microwaves operate at 120 volts, which is standard for household appliances. Ensuring that the outlet provides the correct voltage is essential for the microwave to function properly and avoid any electrical issues.
- Grounding: Grounding is a safety feature that protects against electrical shock and ensures the microwave operates safely. The installation should include a grounded outlet to divert any electrical surges away from the appliance.
- Wiring Gauge: The wiring gauge used for the installation should typically be 12 or 14 AWG (American Wire Gauge) to support the microwave’s power needs. Using the correct gauge prevents overheating and potential fire hazards, ensuring reliable performance.
- Distance from Gas Lines: If the microwave is installed above a stove with gas lines, it’s essential to maintain a safe distance from these lines to avoid any risks associated with gas leaks or heat exposure. Following local building codes can help ensure safe installation in relation to gas appliances.
What Type of Circuit Should You Use for an Over the Stove Microwave?
The best wiring options for an over-the-stove microwave depend on the microwave’s power requirements and local electrical codes.
- Dedicated Circuit: A dedicated circuit is recommended for over-the-stove microwaves to ensure they have enough power without sharing the load with other appliances.
- 20-Amp Circuit: Many over-the-stove microwaves require a 20-amp circuit, which can handle the higher power demands typically needed for cooking and venting.
- Proper Wiring Gauge: The wiring gauge is crucial; using 12-gauge wire is advisable for a 20-amp circuit to effectively manage the electrical load and minimize the risk of overheating.
- GFCI Protection: Depending on local code requirements, it may be necessary to install Ground Fault Circuit Interrupter (GFCI) protection for safety in areas that may be exposed to moisture.
A dedicated circuit ensures that the microwave operates efficiently and reduces the risk of tripping breakers that might occur if other appliances are on the same line. It provides a stable power supply, essential for the microwave’s performance, especially during high-demand cooking tasks.
Using a 20-amp circuit is particularly important for over-the-stove microwaves, as they often have higher wattage ratings (typically between 1000 to 1500 watts). This allows the appliance to function optimally without overloading the circuit.
The proper wiring gauge is critical for safety and functionality; 12-gauge wire is capable of handling the required amperage without significant voltage drop, which can affect appliance performance. Using the correct gauge also helps prevent overheating and potential fire hazards.
GFCI protection may be necessary in kitchens where moisture is prevalent. This added safety measure helps prevent electrical shocks and is an important consideration when installing appliances in close proximity to sinks or water sources.
What Gauge Wire Is Ideal for Wiring an Over the Stove Microwave?
The ideal gauge wire for wiring an over the stove microwave is typically 12 or 14 AWG, depending on the specific requirements of the microwave and local electrical codes.
- 12 AWG Wire: This gauge is recommended for larger microwaves that require more power, typically rated above 1,200 watts. It can handle up to 20 amps of current, making it suitable for appliances that demand higher electrical loads.
- 14 AWG Wire: This wire gauge is often suitable for smaller microwaves or those rated under 1,200 watts. It supports up to 15 amps, which is sufficient for many standard over-the-stove microwaves while ensuring safety and compliance with electrical standards.
- Local Electrical Codes: It’s essential to check local electrical codes as they may dictate specific requirements for appliance installation, including the acceptable wire gauge and circuit ratings. Compliance with these codes ensures safety and reliability in the electrical system.
- Dedicated Circuit: Installing a dedicated circuit for your over-the-stove microwave is crucial to prevent overloading. This means that the microwave has its own circuit breaker, minimizing the risk of tripping breakers and ensuring consistent power supply.
- Wire Material: Copper wire is generally preferred for its excellent conductivity and durability. While aluminum wire can be used, it requires larger gauge sizes due to its higher resistance, making copper the more efficient choice for wiring appliances.
What Safety Precautions Should Be Considered When Wiring an Over the Stove Microwave?
When wiring an over the stove microwave, several safety precautions are essential to ensure proper installation and avoid hazards.
- Turn Off Power: Always switch off the circuit breaker before starting any electrical work to prevent electrical shock.
- Use the Correct Voltage: Ensure that the microwave is compatible with the voltage provided by your home’s electrical system, typically 120 volts for standard models.
- Follow Local Codes: Adhere to local electrical codes and regulations, which may dictate specific wiring methods and materials for kitchen appliances.
- Use Proper Wiring Gauge: Select the appropriate gauge of wire that can handle the microwave’s amperage; typically, a 14-gauge wire is suitable for most over the stove microwaves.
- Secure Connections: Make sure all wire connections are tight and secure to prevent arcing or shorts, which can lead to hazards.
- Grounding: Properly ground the microwave to prevent electrical shock; ensure the microwave has a grounding wire connected to the electrical box.
- Use a Dedicated Circuit: Ideally, the microwave should be on a dedicated circuit to avoid overloading and ensure it operates efficiently without disrupting other appliances.
- Check for Ventilation: Ensure that the installation allows for proper ventilation, preventing overheating and fire hazards.
Turning off the power is crucial as it eliminates the risk of accidental electrocution while you work on the wiring. Using the correct voltage ensures compatibility, which is essential for the safe and efficient operation of the microwave.
Following local codes is important as it guarantees that your installation meets the necessary safety standards, reducing the risk of issues during use. Choosing the proper wiring gauge is vital since using wires that are too thin can lead to overheating and potential fire hazards.
Securing connections prevents loose wires that can cause shorts, while grounding protects users from electrical shock by providing a safe path for stray electricity. A dedicated circuit minimizes the risk of overloading and ensures that the microwave functions correctly without interference from other devices.
Finally, ensuring adequate ventilation is critical, as built-up heat can lead to failure and increase the risk of fire, making it an often-overlooked but essential safety consideration during installation.
What Do Experts Recommend for Installing Wiring in Over the Stove Microwaves?
Experts recommend several key considerations for installing wiring in over the stove microwaves:
- Dedicated circuit: A dedicated circuit is essential for over the stove microwaves to prevent overloading other circuits in the home.
- Proper wire gauge: The wire gauge must be appropriate to handle the microwave’s wattage, typically requiring 12 or 14-gauge wire.
- GFCI protection: Ground Fault Circuit Interrupter (GFCI) protection is recommended to enhance safety, especially in kitchen environments.
- Code compliance: Installation should comply with local electrical codes to ensure safety and legality.
- Clearance and accessibility: The wiring should be installed in a way that maintains clearance and accessibility for future maintenance or repairs.
A dedicated circuit is essential for over the stove microwaves to prevent overloading other circuits in the home. This ensures that the microwave receives sufficient power without causing circuit breakers to trip, which could lead to inconvenience and potential damage.
The wire gauge must be appropriate to handle the microwave’s wattage, typically requiring 12 or 14-gauge wire. Using the correct gauge is crucial, as it helps prevent overheating and ensures efficient operation of the appliance.
Ground Fault Circuit Interrupter (GFCI) protection is recommended to enhance safety, especially in kitchen environments. GFCI outlets are designed to protect against electrical shock by shutting off power when a fault is detected, making them a vital safety feature in areas where water is present.
Installation should comply with local electrical codes to ensure safety and legality. Following these codes can prevent fines and ensure that the installation is safe for use, reducing the risk of electrical hazards.
The wiring should be installed in a way that maintains clearance and accessibility for future maintenance or repairs. Proper installation allows for easier access to wiring components, which is important for troubleshooting or upgrading the system in the future.
What Common Mistakes Should Be Avoided When Wiring an Over the Stove Microwave?
When wiring an over-the-stove microwave, several common mistakes should be avoided to ensure safety and functionality.
- Improper Electrical Rating: Using an electrical outlet or wiring that does not meet the required amperage for the microwave can lead to overheating and potential fire hazards.
- Neglecting Local Codes: Failing to adhere to local electrical codes and regulations can result in unsafe installations that could cause electrical failures or hazards.
- Insufficient Clearance: Not providing adequate space around the microwave for proper ventilation can lead to overheating and reduced efficiency, possibly damaging the appliance.
- Ignoring Grounding Requirements: Not properly grounding the microwave can create a risk of electrical shock and increase the likelihood of equipment failure.
- Overlooking the Circuit’s Load Capacity: Connecting the microwave to a circuit that is already overloaded with other appliances can trip breakers and pose a fire risk.
- Incorrect Wiring Connections: Failing to correctly connect the hot, neutral, and ground wires can lead to malfunction or damage to the microwave, as well as a potential safety hazard.
- Inadequate Support for the Microwave: Not providing sufficient structural support during installation can lead to the microwave becoming loose or falling, causing injury or damage.
Using an electrical outlet or wiring that does not meet the required amperage for the microwave can lead to overheating and potential fire hazards. It is essential to ensure that the outlet is rated for at least 15 or 20 amps, depending on the model of the microwave.
Failing to adhere to local electrical codes and regulations can result in unsafe installations that could cause electrical failures or hazards. Always check local guidelines to ensure compliance and safety during installation.
Not providing adequate space around the microwave for proper ventilation can lead to overheating and reduced efficiency, possibly damaging the appliance. It’s important to follow the manufacturer’s specifications for clearance distances to allow for proper airflow.
Not properly grounding the microwave can create a risk of electrical shock and increase the likelihood of equipment failure. Ensure that the microwave is connected to a grounded outlet to mitigate shock risks and enhance safety.
Connecting the microwave to a circuit that is already overloaded with other appliances can trip breakers and pose a fire risk. It’s advisable to dedicate a circuit for the microwave to avoid complications and ensure reliable operation.
Failing to correctly connect the hot, neutral, and ground wires can lead to malfunction or damage to the microwave, as well as a potential safety hazard. Double-check wiring connections against the manufacturer’s instructions to ensure they are correct.
Not providing sufficient structural support during installation can lead to the microwave becoming loose or falling, causing injury or damage. Make sure to secure the microwave to the wall and cabinet properly to prevent any accidents.
How Can You Ensure Compliance with Local Electrical Codes When Wiring Your Microwave?
Ensuring compliance with local electrical codes when wiring your microwave involves several important factors:
- Consult Local Codes: Before starting any wiring project, it’s essential to check the local electrical codes that apply to your area. These codes may specify particular requirements for appliance installations, including the amperage, circuit type, and placement.
- Hire a Licensed Electrician: Engaging a licensed electrician can help ensure that your installation meets all necessary codes and standards. Electricians are knowledgeable about local regulations and can provide guidance on the best practices for safely wiring your microwave.
- Use Proper Circuitry: Installing your microwave on a dedicated circuit is often required to prevent overloading existing circuits. This ensures that the microwave operates efficiently and reduces the risk of tripping breakers or causing electrical hazards.
- Follow Manufacturer Instructions: Always adhere to the manufacturer’s installation guidelines, as they often include specific requirements for electrical connections. These instructions will provide crucial details regarding the safe operation and compliance of the appliance.
- Install Ground Fault Circuit Interrupters (GFCI): In areas like kitchens, using GFCI outlets is often mandated by code. These outlets help protect against electrical shock by shutting off the circuit when they detect ground faults, making them vital for appliances like microwaves.
- Ensure Adequate Ventilation: Local codes may also dictate how microwaves should be ventilated, especially for over-the-stove models. Proper ventilation not only complies with regulations but also enhances the appliance’s performance and safety.